

A talk box is simplistic in design and function. Its main components consist of a speaker (usually a horn driver), a casing, a length of vinyl tubing, and the inside of a person’s mouth. An instrument, usually a guitar or keyboard, is plugged into an amplifier, which is then plugged into the talk box. The amplifier drives the speaker within the talk box, sending sound up through the vinyl tube and into the musician’s mouth. The sound is then shaped by varying conditions—the mouth’s shape, vocal cord movement, and the tongue’s position.
This project requires entry level crafting skills and zero electrical knowledge. We will modify a Smokey Amp with a few items found at most any hardware store. If you already own a Smokey Amp it will cost you around 15 to 20 bucks; if you do not, it will cost around $50—either way it is an affordable way to obtain an awesome talk box sound.
Please read through the instructions before beginning; if you are prepared, and have everything on the list set up, you should be able to complete this project in under an hour–see the part/suggested tool list at bottom of the page. Click on any image to zoom in for a closer look.
Check out this quick and dirty video we put together. Dig that crazy talk box song that we made up on the fly.
INSTRUCTIONS:
1) Remove adjustable clamp from 1-1/2 rubber cap
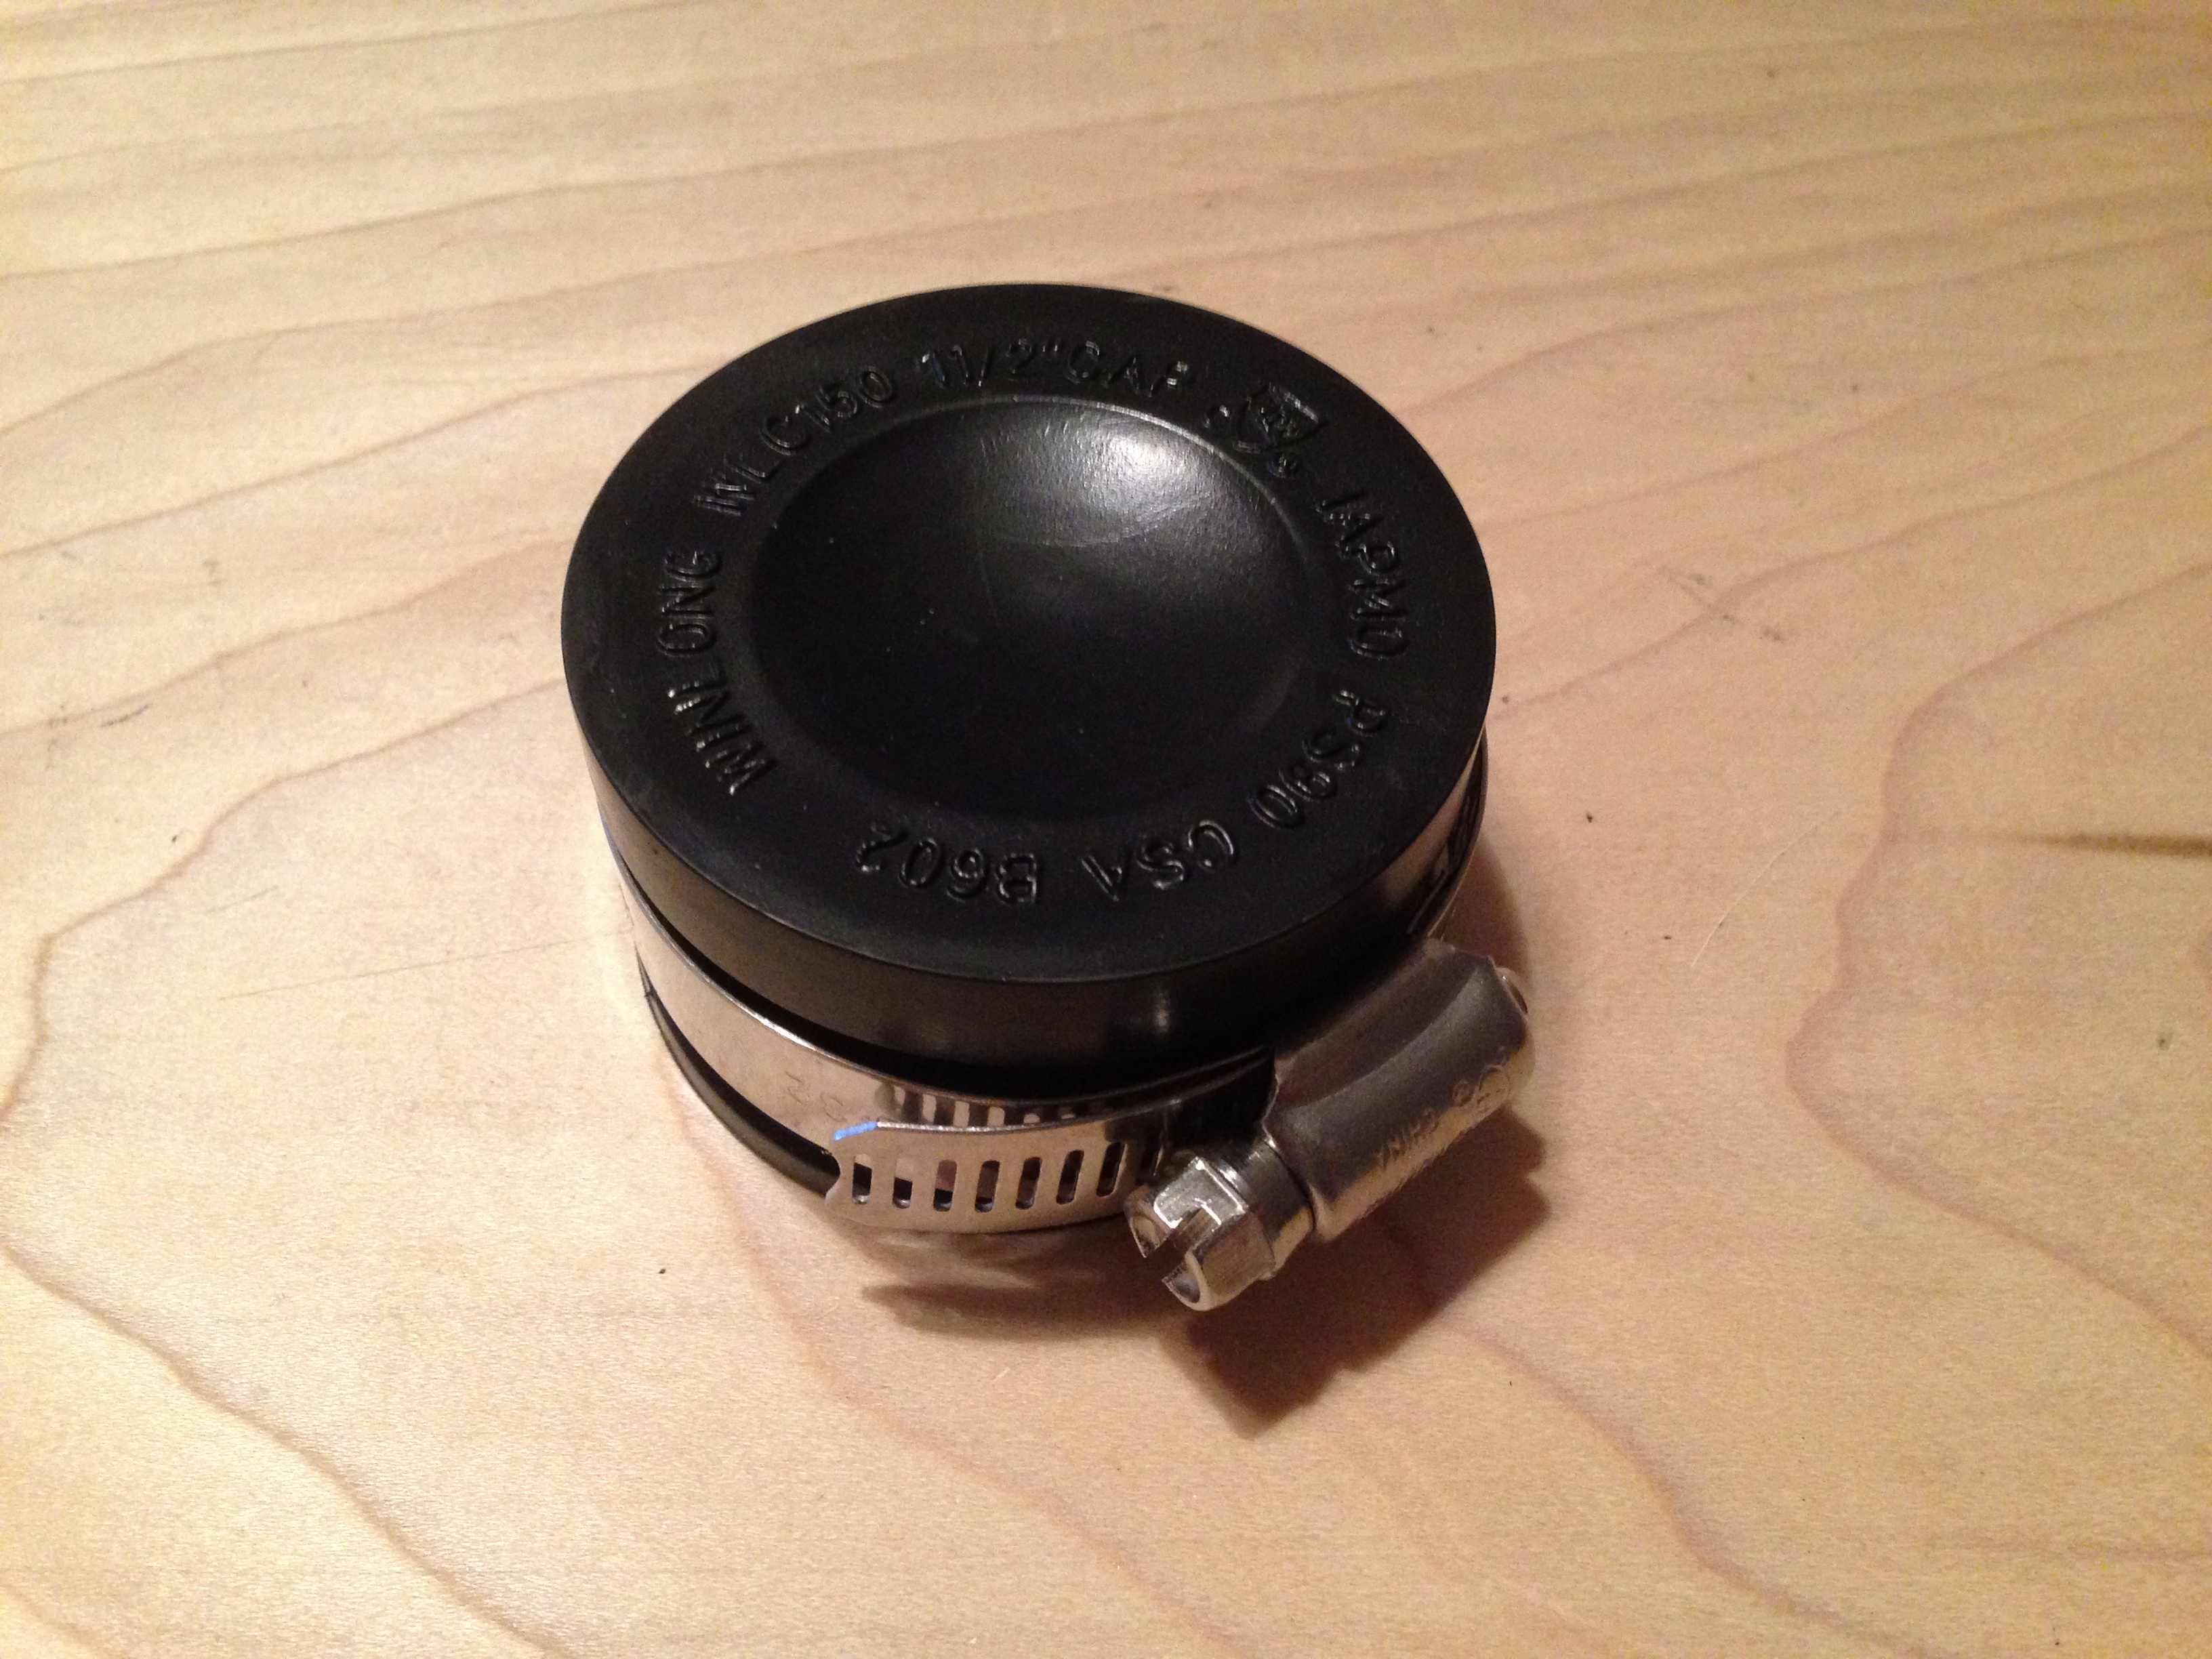

a. Turn screw counter-clock wise to loosen the clamp.
b. Remove clamp from cap—discard clamp.
2) Fabricate center hole in 1-1/2 rubber cap. (If a drill is not available, a hobby knife may be used to cut the hole; but special care must be taken not to over cut the hole, otherwise, the tube may not seal properly).

a. Locate a spade bit that will create a proper sized hole relative to the tube size desired:
1/2” ID / 5/8” OD tube = 5/8” spade bit
3/8” ID / 1/2” OD tube = 1/2” spade bit
(I recommend 5/8 OD tube with a short length of 1/2” OD tube for a mouth piece—5/8 OD tube feels cumbersome in the mouth, but 1/2 OD transports less sound).
b. Find the center of the rubber cap and begin to drill, slowly, applying light to moderate pressure.
c. Using a hobby knife, cut excess material away from the hole.
3) Attach 1/2” x 8” “hook and loop” strap to 1” key ring or steel ring.

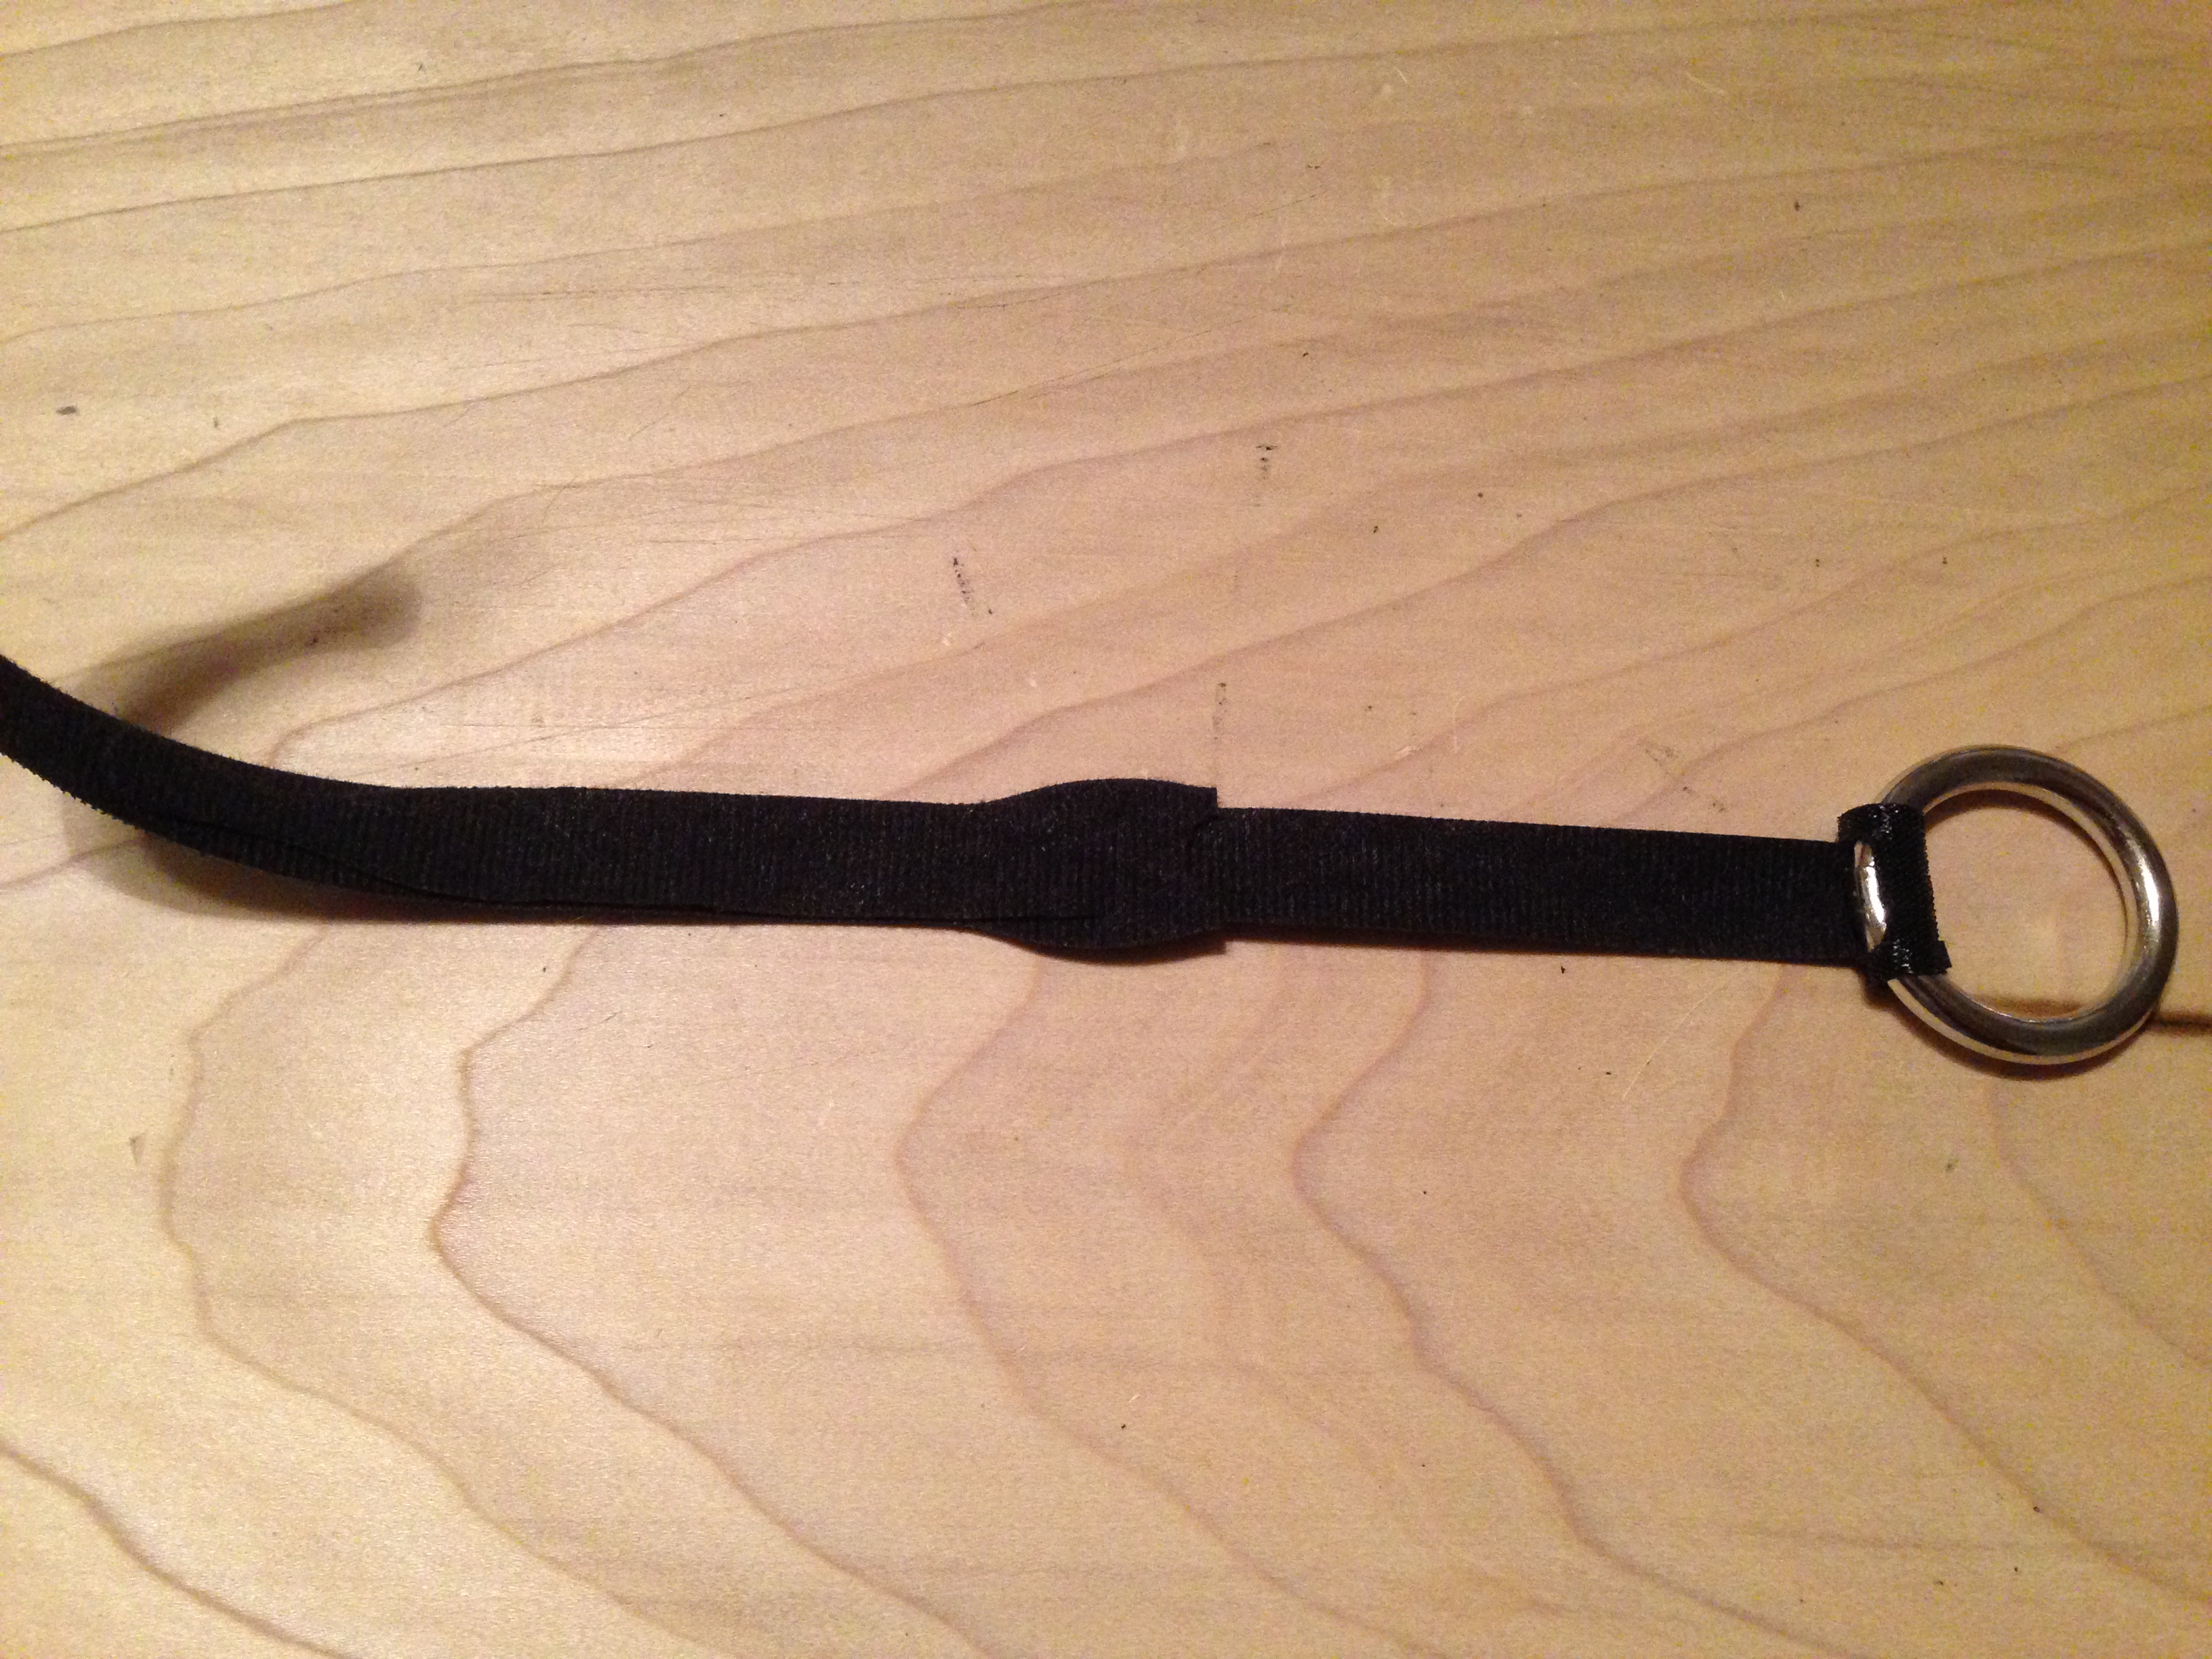
a. Thread a strap through the ring, looping the strap around and pulling it through the strap’s slot. Pull the strap as tight as possible to avoid slippage when tightening later.
b. To add length, attach the second strip, threading it onto the first strip about 2-1/2” – 3” from the ring
c. Press the hook and loop straps together, making sure that they are straight and the bond is tight. If the straps do not bond, turn one of the straps over and repeat step 3b.
4) Adhere a 1/2” piece of hook and loop strip to the back of the mini amp.
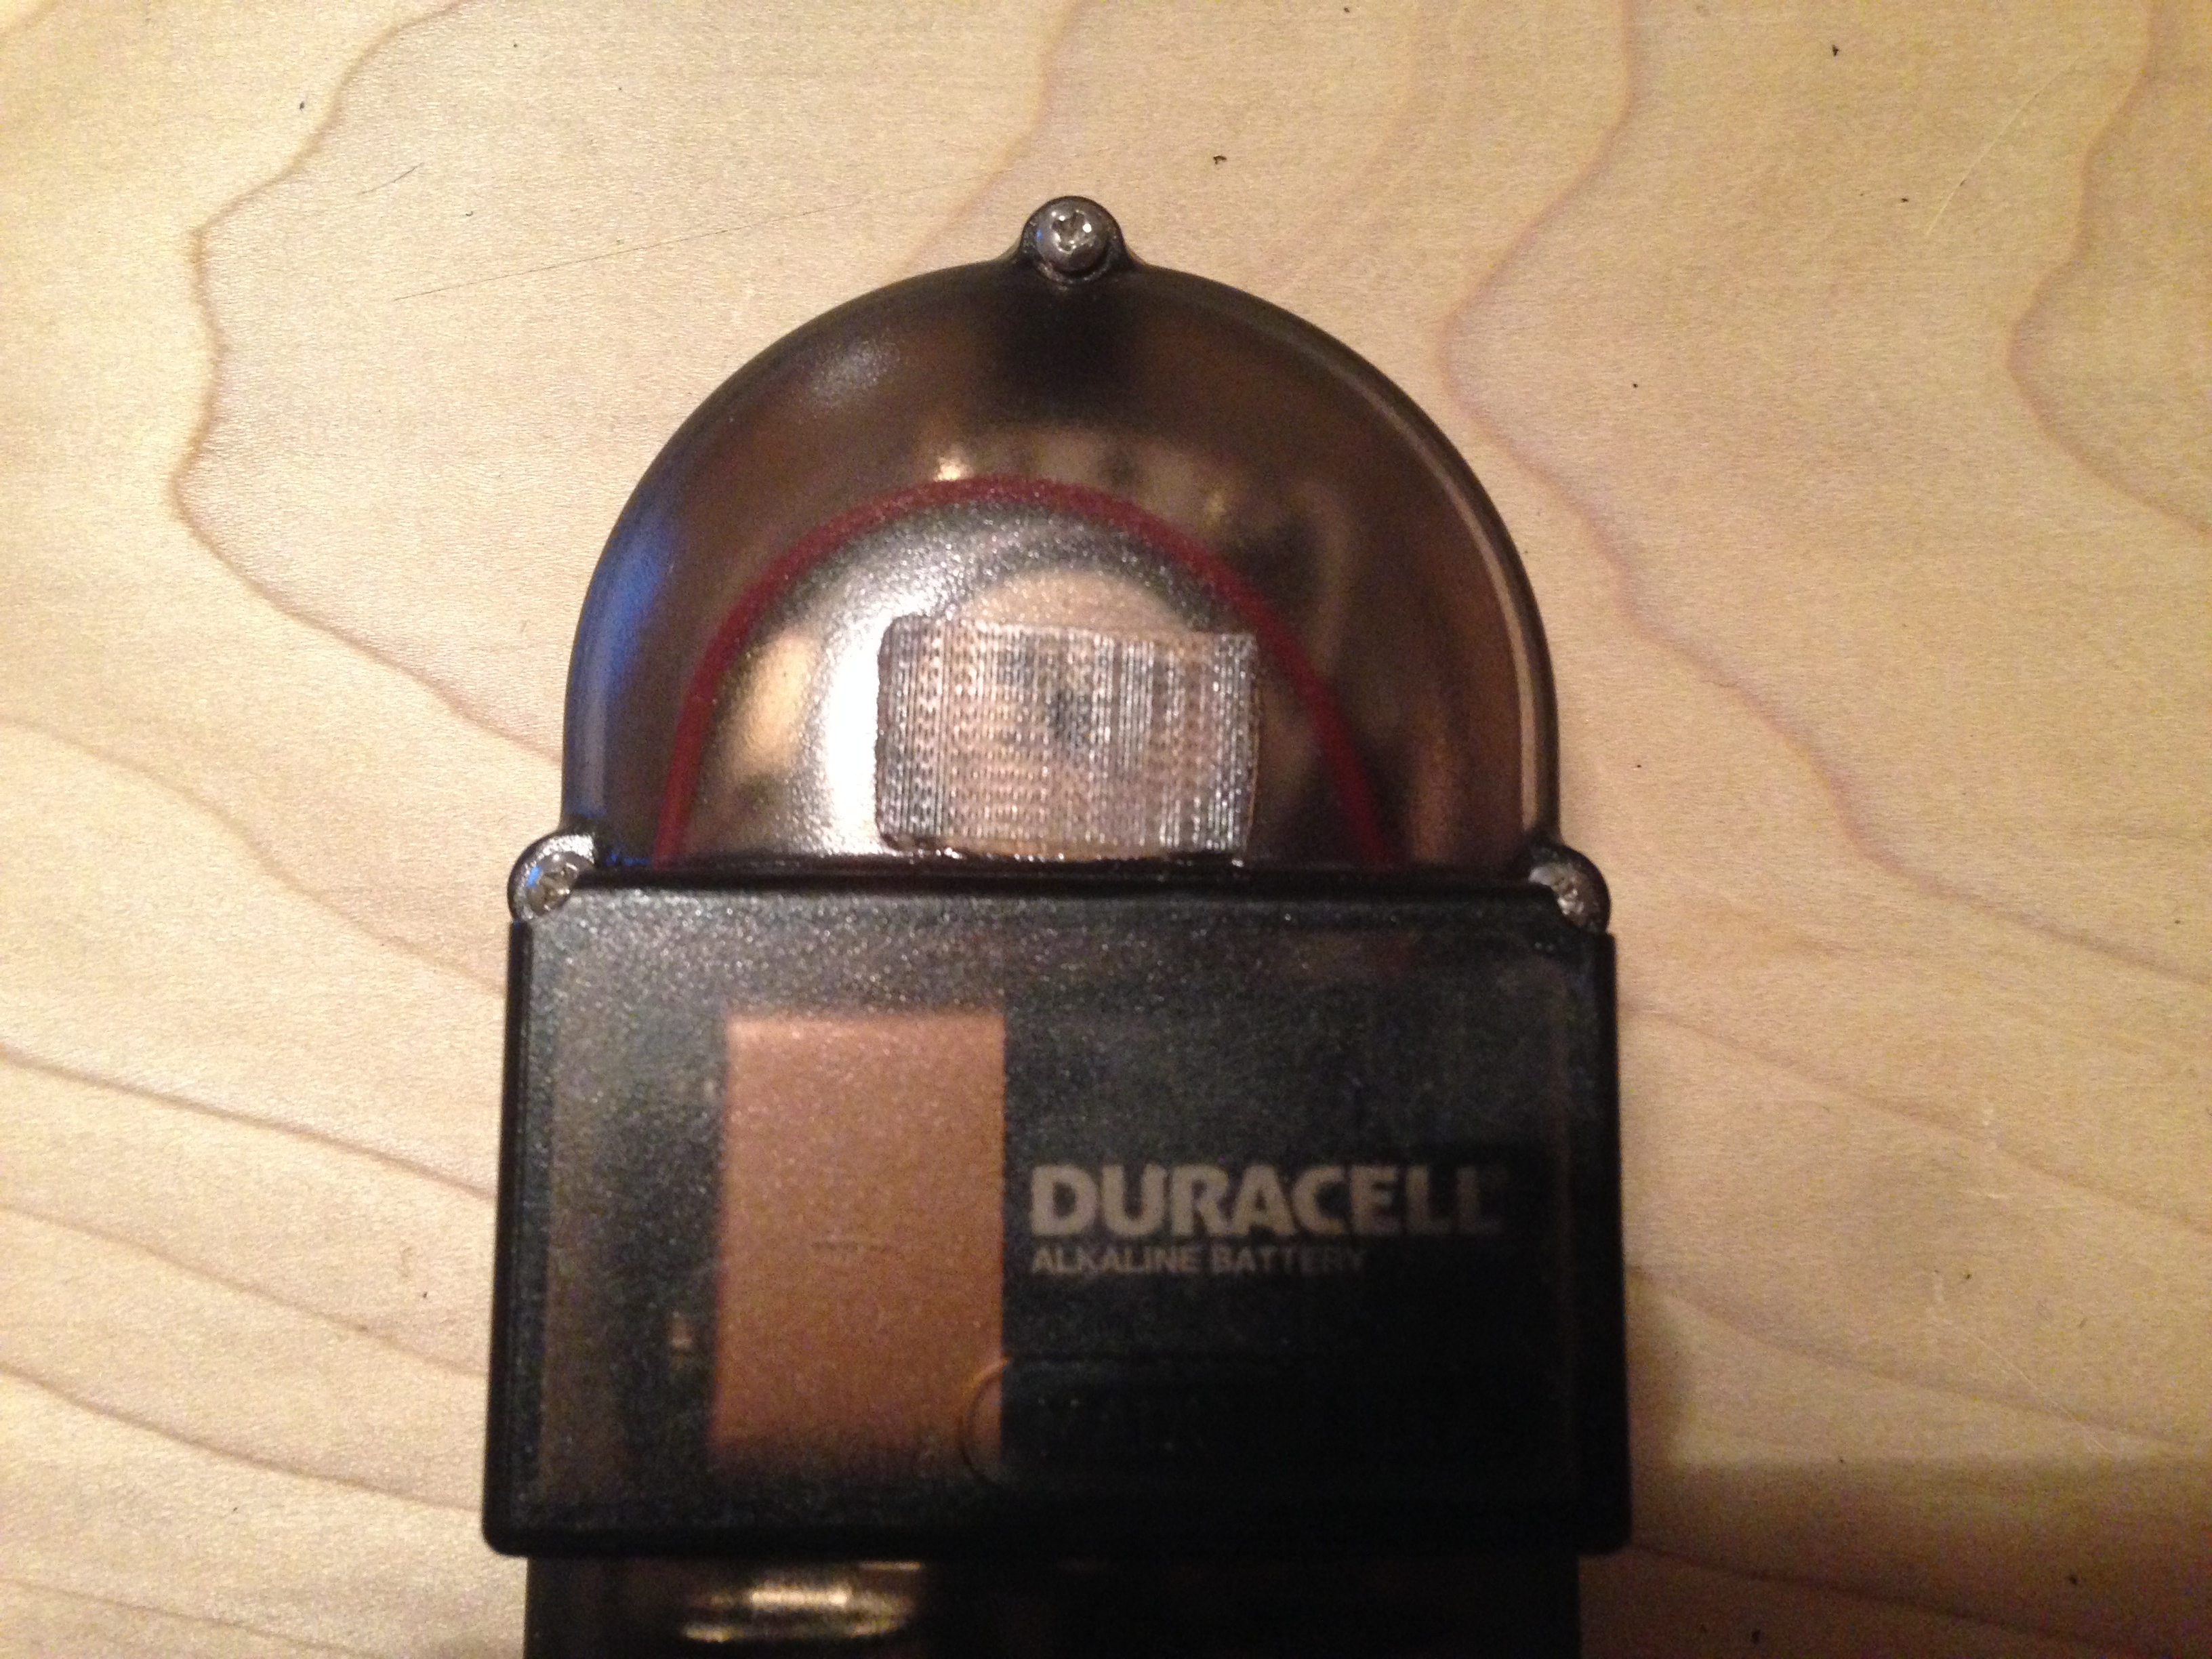
a. Choose the “loop” strip. The loops are identified as being soft, where as the strips with hooks are rough to the touch.
b. Cut a 1/2” section from the strip with loops.
c. Pull the backing off of the 1/2” strip and adhere it to the back of the mini amp, just behind the speaker and against the battery casing.
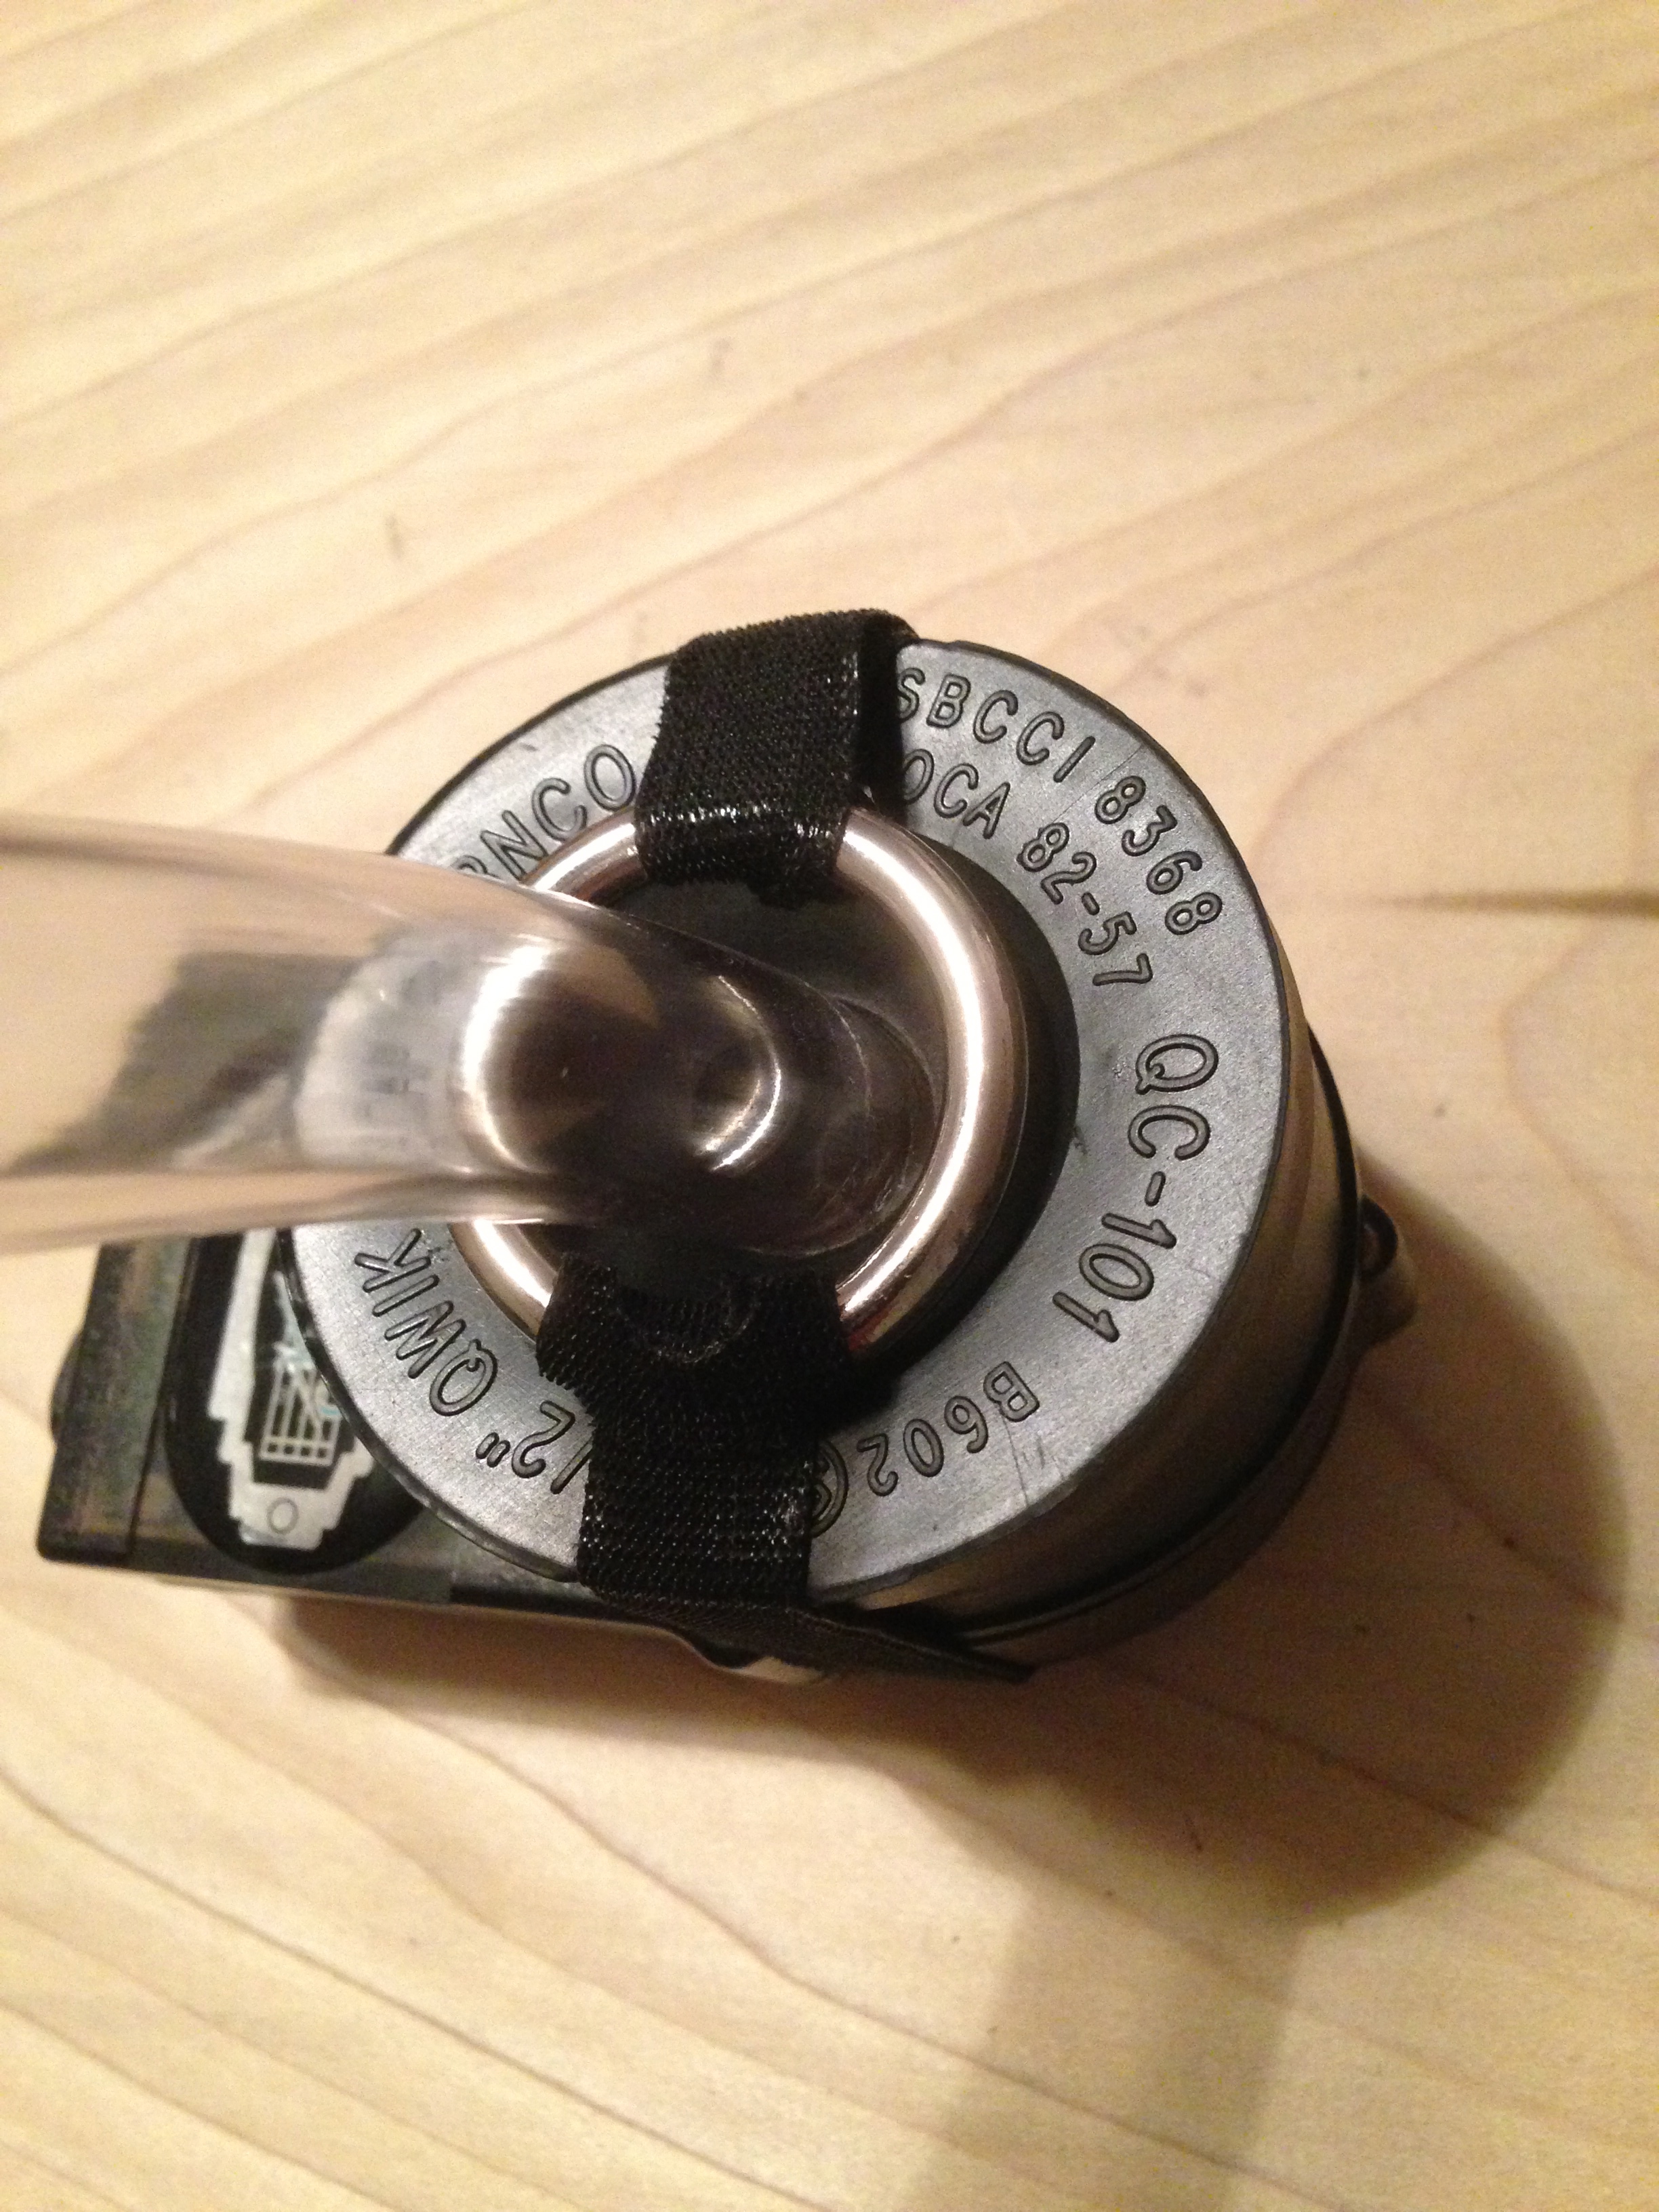
5) Strap 1-1/2” rubber cap to amp over the speaker.


a. Align rubber cap over the speaker, making sure that it creates a light seal.
b. Position ring, with the strap attached, about a 1/4 inch to the side of the hole on top of the cap.
c. Keeping the ring in position, pull the hook and loop strap taught and wrap it around the amp with the hook side of the strap facing down.
d. Attach the strap to loop strip on the back of the amp and continue around to the top of rubber cap.
e. Thread the strap through the other end of the ring and pull the strap back tightly centering the ring over the hole. If the ring is not centered, go back to step “b.” and try again.
f. Wrap the strap backward, twisting it once; attach the excess strap to itself.
g. Reposition the rubber cap, making sure that it is seated properly, with a firm yet pliant seal. If the cap seems crushed and will not retain its shape, it is too tight—go back to step “b.” and loosen the strap. Adjust the ring accordingly.
6) Cut 1/2 ID / 5/8 OD tube to size. The length of the tube is dependent upon how you are going to use the talk box. If you are going to let it lay on the floor, cut 7 – 8 feet; if you want to attach it to your person (for portability) or to a mic stand, cut 4 – 5 feet.


a. Unroll the tube and hold one end close to your mouth, allowing the remainder to drop to the floor.
b. Decide where the talk box will be located, whether on your person/a mic stand or the floor and place the remainder in that position.
c. Find the minimum length necessary to attach the tube between your mouth and the talk box, adding 1 – 2 feet to be safe. Mark off the length with a felt tip pen.
d. Place the tube on a cutting board or something similar, to protect your work surface. Find your mark, and cut the tube applying slow even strokes with a box cutter or other sharp knife. A small PVC pipe cutter works best for a smooth factory cut but is completely optional.
7) Clean the cut 1/2” ID / 5/8” OD tube.
a. Fill a large, clean bowl with warm water and antibacterial dish soap.
b. Submerge vinyl tube in the bowl, allowing the soapy water to run through the inside of the tube.
c. Clean tube with a clean cloth, paying special attention to the four inches at either end.
d. Remove the tube from the bowl, allowing water inside the tube to escape. Rinse thoroughly under the faucet, running water through the inside of tube until all of the soap is washed out. Leave the bowl of soapy water stand for a moment.
8) Attach 1/2” ID / 5/8” OD tube to 1-1/2” rubber cap on talk box.
a. Carefully, push one end of the tube through the 5/8” hole on top of the rubber cap. About a 1/2 inch should be far enough; any further could puncture the speaker.
b. Pull on the tube gently, to make sure that it is installed properly. If it does not slide out, it is in far enough.
9) Cut 3/8” ID / 1/2” OD tube to form a more manageable mouthpiece. Steps 9 – 12 can be optional, but utilizing smaller tube will make forming words easier, especially in the beginning.
a. Measure 7 – 8 inches of 3/8” ID / 1/2” OD tube and mark it off with a felt tip pen.
b. Place the tube on a cutting board or something similar, to protect your work surface.
Find your mark, and cut the tube applying slow even strokes with a box cutter or other sharp knife. A small PVC pipe cutter works best for a smooth looking factory cut but is completely optional.
10) Clean 7 – 8 inches of 3/8” ID / 1/2” OD tube.
a. Submerge vinyl tube in the bowl, allowing the soapy water to run through the inside of tube.
b. Clean tube with a clean cloth.
c. Remove the tube from the bowl, allowing water inside the tube to escape. Rinse thoroughly under a faucet, running water through the inside of tube until all of the soap is washed out.
11) Install 7 – 8 inch mouthpiece.

a. Grip 1/2” ID / 5/8” OD tube about 6 inches from opening.
b. With your other hand, twist the 7 – 8 inches of 3/8” ID / 1/2” OD tube, pushing it into the 1/2” ID / 5/8” OD tube. Leave 4 inches of 3/8” ID / 1/2” OD tube protruding. Friction will keep the 3/8” ID / 1/2” OD tube from sliding out; it can be removed by twisting as it is pulled out.
12) Clean mouthpiece before using.
a. Clean the attached 3/8” ID / 1/2” OD tube, that will go into your mouth, with an antiseptic mouth wash or spray with a mouthpiece sanitizer for brass instruments. It is recommended that the mouthpiece is cleaned in this way before and after each use.
13) Attach the removable clip to mini amp. (Optional–you can also slip the cables between the strap and guitar and let it hang.)
a. Thread a 1/2” x 8” hook and loop strap through a second 1” key ring or steel ring, looping the strap around and pulling it through the strap’s slot. Pull the strap as tight as possible to avoid slippage when tightening later.
b. Position ring, with the strap attached, slightly off center on the back of the mini amp.
c. Keeping the ring in position, pull the hook and loop strap taught and wrap it around the amp with the hook side of the strap facing down.
d. Thread the strap through the other end of the ring and pull the strap back tightly, centering the ring. If the ring is not centered, go back to step “b.” and try again.
e. Wrap the strap backward, twisting it once; attach the excess strap to itself.
f. Slip one loop of the metal clip through second 1” ring.
g. Hang the other metal clip loop on your belt, pants, or anything else that will accommodate the clip—the 1/4” jacks on the mini amp should be pointing upward.
Hookup
At the bare minimum, an instrument can be attached to the 1/4” input jack of the talk box with the shortest cable necessary to make a connection. For instance, a 6-inch patch cable should be sufficient to connect a guitar, while a 2 – 3-foot cable may be necessary for most keyboard applications. In any case, a shorter cable will lend well to its use and portability.
A traditional talk box (without a built-in power amp) is hooked up in the following configuration:
guitar/keyboard –> amplifier –> talk box –> microphone –> amplifier/PA –> speaker
However, the hookup for your talk box will be slightly different; it will not be necessary for you to amplify the signal coming from an instrument, as the base unit is already amplified. Therefore,
your hookup will be configured as follows:
guitar/keyboard –> talk box –> microphone –> amplifier/PA –> speaker
This configuration will allow you to use this unit in a variety of ways:
a. You can use it as a portable, stand-alone unit. In low noise situations, such as personal practice sections or in small groups this unit is more than loud enough to be used as a practice amp with an onboard talk box; therefore, an instrument and your talk box will be sufficient for low-level amplification. In this application you would insert the tube into the side of your mouth and clamp it lightly between your molars—take care not to crush the tube.
b. You can use the full configuration and amplify the sound coming out of your mouth with a microphone and amplified speaker system. The talk box unit can be clipped or mounted to the microphone stand and the tube strapped to the microphone leaving 2-1/2 – 3 inches extending past the microphone’s head.
c. As an additional application, you may place the tube in varying environments. You can place the tube inside an acoustic guitar or in front of a running fan using a microphone to capture the resulting effect. Experimentation will uncover a variety of environments.
Using Effects
You can use a full range of effects with your talk box. It is complimentary to at least add a distortion to the mix, but the type of distortion used is a matter of preference; it is best to experiment with multiple effect pedals to gainthea desired sound. Smooth, consistant sounding distortions seem to work best—reverb should be avoided, as it tends to muddle the mix.
Check out this video:
Appendix:

| Parts List | ||||
| Part Number | Qty | Description | Vendor | Price |
| PQC-101 | 1 | 1-1/2” PVC DWV Flexible Cap | Home Depot | $2.97 |
| 7593 | 1 | 1” Welded Steel “O” Ring | Lowes | $0.78 |
| 90924 | 1 | Velcro 50 ct. 8 in. Reusable Straps | Lowes | $4.97 |
| 91327 | 1 | Velcro Brand 3-1/2 in. x 3/4 in. clear strips | Home Depot | $2.98 |
| SVKI10 | 1 | Vinyl Tubing SV 5/8” x 1/2” x 10’ | Lowes | $4.59 |
| RVIG | 1ft | 3/8”ID (1/2”OD) Vinyl Tubing Per LFT | Lowes | $0.39 |
| Tool List | ||
| Part Number | Description | Vendor |
| —— | Drill | —— |
| —— | Spade Bit Set (preferred) | —— |
| —— | Drill Bit Set | —— |
| —— | Ratcheting PVC Cutter (optional) | —— |
| —— | Hobby Knife | —— |
| —— | Scissors | —— |
![]()
