Poppy’s Keepsake Box Three-String, Acoustic-Electric, Lap Steel Uke w/ Children’s Stubby Slide

A friend of mine has a daughter named Poppy who is nearly three years old. I had not yet made a cigar box uke, but since the holidays were approaching and I had found this very cool keepsake box with her name on it, I thought it would be a great opportunity to give it a go.

Box

It started out as an attractive box. The name and image were actually printed on a 4.25″x4.25″ piece of tile, which was then inserted into the beautifully stained hardwood exterior. The interior was velvet-lined and it had spring-loaded hinges that kept it open and snapped it shut.

I kept the tile and hinges as is, but sanded off the finish and tore out the interior lining. I cut a slot for the neck, which didn’t turn out to be as difficult as it seemed it would be.

Neck, Head and Finish

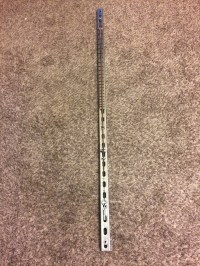
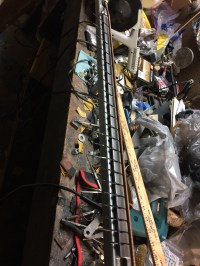
The structure is really a stick-through design, so the piece of 1×2 maple runs the length of the instrument. I laid out the scale, which I based on my banjolele project—thirteen inches from bridge to nut.

Once I found the location of the nut, I knew where the tuners and headstock design would be carved. I cut down the neck to size, carved the tuner slot based on my template and then carved the Double Blade design into the headstock.

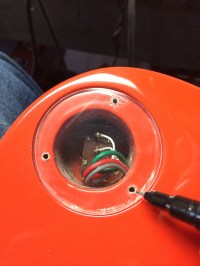
Pickup, Output Jack and Strap Button

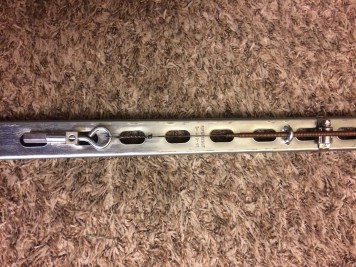
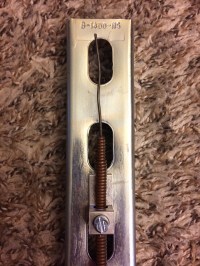
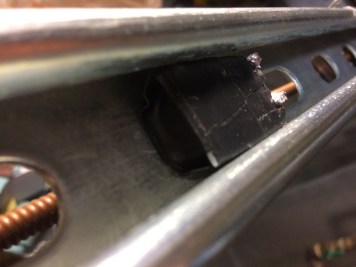
I planned to install a JSA Electromagnetic Cigar Box Guitar Pickup, so I found the closest point to the neck pickup position and drilled a 1″ oval close to the pickup’s size. I trimmed the pickup a bit to make it fit easier.

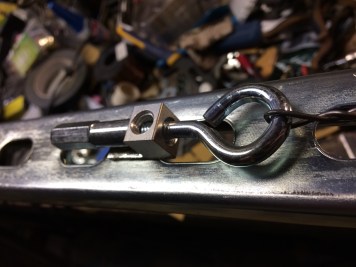
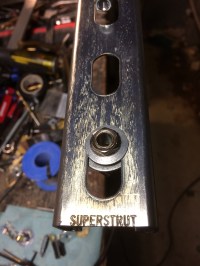
I installed a strap button made from a brass knurling nut and a stainless steel security screw, which also serves to secure the neck to the box.

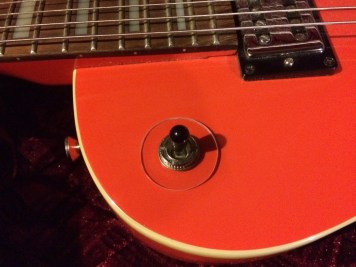
The output was installed in the upper corner instead of the lower corner to make it easier to play. Both units were wired together and a ground wire was added to reduce hum, when attached to one of the strings.

Fretboard, Nut and Bridge

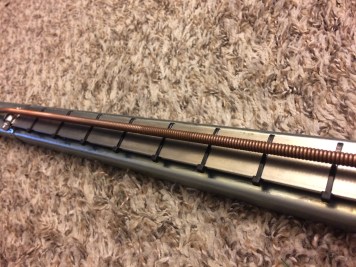
The fretboard is an oak 1/4″x2″. It was cut to length, finished, glued, set in place and clamped. Later, I filed small notches in the top of the fretboard to mark the frets.

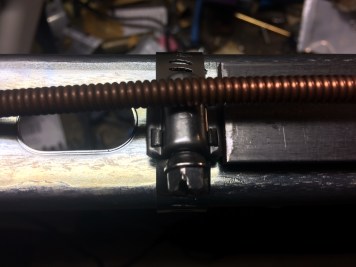
The nut was cut from a piece of 3/8″ rebar and then ground flat on the bottom and side to set flush against the neck and fretboard. The bridge is made from a length of 1/8″ brass bar. Each of their heights and positions created a level string action.

Strings, Tuners, Strap and Brand

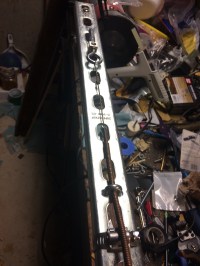
The tuners are standard China machines that look cooler than they perform, but they do the job and keep their tune regardless of the slack in the gears. I orientated them similar to a lap steel, because it’s not something that I have seen on such a small instrument.

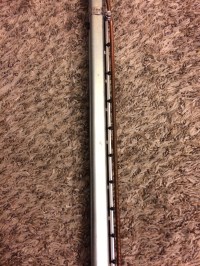
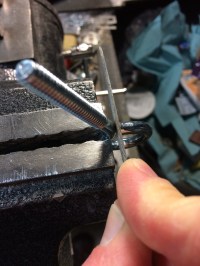
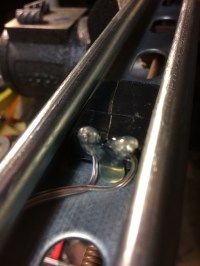
The string holes were drilled just behind the brass bridge, at an angle, into the neck. After running the strings through the holes to tuners, I cut a small piece of leather to cover the the holes, which was glued across the bottom and has two small, brass screws at the top.

The strap is made entirely from duct tape—rainbow pattern for the length of the strap and gold for the ends. The headstock strap tie is made from a scrap piece of leather.

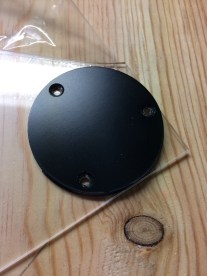
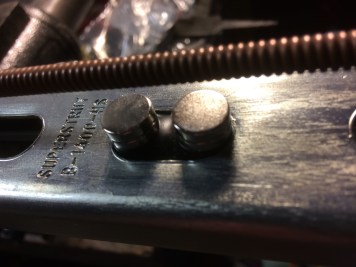
Branded Initials and Custom Slide

This is the first use of my newer branding iron with my initials. I already had one with my Junk Shop Audio logo, but I thought it would be cool to add my sign as well.

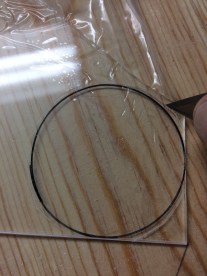
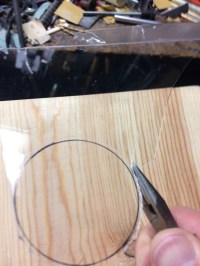
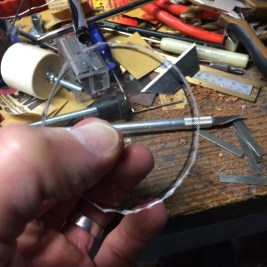
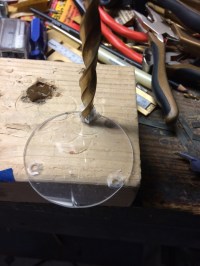
Since this instrument would potentially be played by small hands, I made a 40mm stubby slide that has a US ring size 4.

Final Notes

All in all it was a fun build and turned out petty cool. Used acoustically, the box is only held together by the spring-loaded hinges, so there is a slight rumble from the top and bottom of the box vibrating against each other, which offers an excellent resonating sound.

Video:

https://youtu.be/c_SfcPiVYWI

Thanks,

JSA Cigar Box Guitar S4 – Homemade Plexiglass Pickguards and Cavity Plates

I’m working on a modification for this guitar that necessitates that I drill a hole in the cavity plate, so I decided to make a substitute to keep from damaging the original—because to be frank, where am I going to find a replacement cavity plate for a DeArmond?

I didn’t have a Dremel and didn’t really know how to cut or shape plexiglass, but I found an 8″ x 10″ piece for $4.00, so I was ready to rock. After feeling my way through fabricating the main cavity plate, I decided to make a toggle switch cavity plate as well…

I had the original, so I removed the protective plastic from one side and placed it as close to the edges as possible. Then, I traced it in Sharpie.

Quick research uncovered that I need only cut around the shape with a razor blade. After etching a circle about a 16th of an inch outside of the Sharpie outline, I flipped the blade backward and traced the etched circle two more times.

I removed the protective plastic from the bottom and then used a pair of small needle-nose pliers to break off the outer material, in small pieces, leaving a rough circle.

Using a small bench grinder, I removed the material in an even, circular motion up to the Sharpie outline. Then, placed the cover in the hole to check for proper fit and went back to the grinder for small adjustments. In absence of a grinder, files or sandpaper could be used, but it would require multiple grits and a lot of time.

Once the cover fit, I marked the holes in Sharpie and carefully drilled the holes. Then, I switched to a larger bit to countersink the hole.

I cleaned up the edges with some 220 sandpaper and then installed it.

This same method can be used to make pickguards or switch plates and the plates and guards can be painted or otherwise decorated on the bottom if desired.

See…now I have my 7-pin jack installed and I’m ready to complete the modification without destroying the original plate. As a word of caution, you’ll notice that the plate broke on the screw hole to the right—be careful when drilling your recess hole and don’t over-tighten the screws.

Thanks,

“Slice of Deliverance” – Steel-String Resonator Banjolele w/ Removable Pickup

I chanced upon this banjo uke for a steal at the local antique mall and couldn’t pass up a new project. From what I’ve read, this style of banjo ukulele was produced through the 20’s and 30’s and it’s in really great shape compared to some I have seen for sale online.

This instrument came with a traditional drumhead, but no bridge. Against the advice of most ukulele enthusiast sites my plan was to string it up with steel strings, so that I could add a removable pickup, which is apparently I’ll advised because the neck could succumb to the pressure.

The Before Pictures:

Finish:

The finished was scratched, but was otherwise in fine shape; however, I wanted to add my own style, so I sanded off the finish and stained it with a vinegar and steel wool concoction.

I started with the white vinegar mix that adds a rusty, yellow hue while darkening deep spots. Then, I finished with an apple cider mix that adds a bit more color, grain depth and shine. The mix results in a distressed look that enhances the natural grain, while adding subtle nuances as well as dramatic extremes.

Drumhead and Bridge:

I began by cutting a piece of brass rod for the bridge and then strung it with the top four strings from a pack of DR Pure Blues 9’s.

The uke tuned up, but the drumhead was strained, which lowered the action to the point of rubbing on the rim. So I had to find a new material for the head that would be thin enough to offer as good of a voice as the drumhead.

I had a paint can lid laying on the bench and it appeared to be the right size, so I cut off the rim and it was a perfect fit to replace the drumhead.

Tuners and Tailpiece:

The tuners weren’t complete trash, but I didn’t like the look of them and since I was going to use steel strings, it seemed like a good idea to install decent tuners. I found a set of Grovers that worked great and had a lower profile.

The tailpiece was meant for holding strings with smaller balls ends, so I had to drill small holes in the body to accommodate the steel string balls and allow the tailpiece to sit flat against the body.

Pickup:

Since the paint can worked out so well, it created a perfect opportunity for using a removable pickup made from two of my Nd144 Electromagnetic Cigar Box Guitar Pickups. I had originally built a similar pickup for the “Teeth for Days” build, which had a body that was to thin to house a permanently installed pickup.

Therefore, I created a compact pickup and 1/4″ jack combination that could be easily installed and removed. Since the paint can lid is made of magnetically sensitive material, the pickup can be installed at a whim.

This solves two problems—first, placing the pickup directly on the paint can lid stifles the resonating effect to some degree, so easy installation and removable allows the user to play acoustically without compromise. Second, installation via the inherent magnets keeps me from having to drill extra holes and add unsightly hardware for both the pickup and the output jack. In short, the pickup is fully functionally electric without radically changing the acoustic nature of the instrument.

The most interesting and functional aspect of this pickup is its ability to be removed and potentially used to electrify/amplify another guitar with a body made from magnetically sensitive material, such as a lunch box or cookie tin. The pickup and output jack is wired up and taped together as one unit to simplify this process.

A second feature is the exposed, copper ground wire that makes contact with the paint can lid upon installation. This signal travels through the all magnetically sensitive materials that come in contact with the chain, so the paint can lid, bridge (if changed to steel), strings, and tailpiece all become a place to ground the signal, thus reducing amplifier noise/hum.

Accessories:

I added a strap button comprised of a security bolt and a brass knurled nut. I simply drilled a larger hole in the body and tailpiece to accommodate the larger bolt.

The strap was made from duct tape printed with an American flag design and the headstock strap tie was made of black duct tape with a brass binding screw to hold everything together.

Final Word…

This was a cool project and I developed and appreciation for the ukulele and the benefits of its small size, along with this instrument’s marriage with the banjo.

Check out this quick video that offers this instrument’s amplified and acoustic tones:

Thanks,

“His Dudeness” – Electro-Acoustic Resonator Guitar Modification

Follow this link for additional photos and build notes:

https://wp.me/P3WRqw-VO

Call it The Dude, His Dudeness, Duder, or even El Duderino, but don’t call it Mr. Lebowski.

I received a request to modify this old classical, parlor acoustic. The gentleman had seen a few of my other acoustic modifications and wanted something similar for his acoustic. He gave me full artistic control, so I added materials based on the guitar’s size, shape and the condition of the neck.

Here are some before pictures:

Check out these quick and dirty demonstration videos—one is amplified with distortion the other is unplugged and ends with a little Nuge, but hey, it’s a free for all:

Thanks,

Yard Dog – “SuperStrut” All-Steel, Ultra-Low, Single-String Electric Djent Bass

At a past St. Louis Cigar Box Guitar Club meeting, Sean Oliveira brought in a bunch of piano strings from a unit he had dismantled. He was offering them for free, so I took a thick, low string along with a medium-sized one. I decided to challenge myself to build a guitar around the low string, which has a diameter of roughly a 1/4″.

Since this thick string would exert a lot of force against the instrument’s frame, I would need something a bit more resilient that my usual wood structure. I wanted to maintain a size similar to my previous builds so I chose slotted 1-5/8″ x 13/16 strut.

I started with a five foot length of strut and measured the distance between the bridge and the nut on my Peavey bass, which came out around 34-1/4″. Everything needed to be beefed up on this build—two-hole angles were too weak to handle the force—so everything had to be reconsidered.

Tuner and String:

The first thing that I needed was something to hold the string. Usually I would clamp it with a bolt and knurled nut, but a 1/4″ diameter string needs something more substantial. Luckily, I was able to find some aluminum wire lugs in the electrical section at Lowes. These were excellent both for clamping the string behind the nut and anchoring the tuner.

The tuner is made from a heavy-duty 1/4″ eyebolt, a 1/4″ x 3/4″ steel spacer and a 1/4″ rod coupling. The piano string came with a loop, so I removed a small amount of material at the junction of the eyebolt to allow the string loop to slip onto the eyebolt.

Nut and Bridge:

The nut and bridge are made of stainless steel pipe clamps. I wanted to attach the nut and bridge since the vibration of the large string made it difficult to keep a bolt or other material in place by the force of the string alone. These clamps work perfect for the string size and allow for a proper action. Additionally, I added a u-bolt at the back of the nut and bridge. There was very little tension holding the string in place—the u-bolts worked to create a more focused sound.

Fretboard:

The fretboard is a length of 1/8″ x 1″ steel. It is adhered to the strut with neodymium magnets, which raises the height of the steel just slightly, making the application of zip tie frets possible. I’ve always wanted to try zip tie frets, but I was unhappy with the zip tie being around the back of the neck—this allowed me to place the zip ties around just the steel bar, leaving the back of the strut smooth.

Pickup and Output Jack:

The base coil of this pickup is the same as the Nd144 Electromagnetic Cigar Box Guitar pickup, but I had to modify it to allow for a proper fit. The plastic on the bobbin had to be trimmed to the coil and I used slightly larger neodymium magnets that fit within the slot in the strut.

Nothing special about the 1/4″ output jack. I installed it close to the bottom, with some odds and ends, so that it was out-of-the-way and close to the pickup.

Here’s a quick and dirty video featuring my Peavey bass stack from way back:

(VIDEO PLAYBACK REQUIRES HEADPHONES—SMART PHONE SPEAKERS CAN NOT ACCOMMODATE LOW FREQUENCIES)

Thanks,

img_1926-4

Teeth for Days – Wall Hanger to Electric Guitar with Homemade Modular Pickup

Some people turn guitars into wall hangers—in this case, I turned a wall hanger into an electric guitar. My dad was cruising through a thrift store when he ran across this guy for $2.92. Later, he handed it to me and challenged me to make a working guitar out of it…so that’s what the bunny is going to bring him—Happy Easter Greg!!!

Two things were important for me to accomplish in this mod—first, the face had to remain as clean as possible and second, the wiring had to be minimal.

Bridge and Nut:

Given that I wanted very little interference on the face, I installed string ferrules through the back of the body and positioned them at the gum line on the face to reduce the visual impact. I added a 3/8″ diameter length of brass rod for the bridge and cut down a smaller brass bolt for the nut, which created a string height acceptable for slide playing.

Tuners:

I installed a set of “aged bronze” looking tuners. Only five would fit comfortably across the top and keep the strings within the parameter of the head; therefore, I placed one of the tuners on the bottom, which looks pretty natural. I also installed some small, tarnished screws to guide and add tension to the strings.

Pickup and Output Jack:

For the pickup I carved about a 1/4″ – 3/8″ deep rectangle into the back of the body where I would later install the pickup and then superglued an old razor blade to the bottom of the carved hole. Recall that I wanted minimal wiring, so I decided to to create a modular pickup and output jack pairing that could be easily removed and installed. I started with two JSC Nd144 Electromagnetic Cigar Box Guitar Pickups taped together.

Then, I assembled a homemade output jack from a steel spacer, a brass picture hanger and a bit of electrical tape. I wired the jack to the pickup and taped everything together into one unit. The strong, neodymium magnets on top of the pickup would attach the modular unit to the back of the guitar via the steel razor blade.

I’m impressed with how well this frame has handled the force of the strings—though I took it easy with 9s, I still wasn’t sure what would happen when I tuned up. Additionally, for as thin as the body is, the guitar actually projects more sound than I anticipated, but it can always be plugged in via the modular pickup system. Nevertheless, this was an interesting build and I think my dad will be happy with the results.

Check out this quick and dirty video demonstration:

Thanks,

“TSA Certified” SlipStick Carry-on Electric Steel Guitar

Well…this steel guitar is not actually TSA Certified, but at a length of 20-3/4 inches it does fit diagonally in a carry-on suitcase. I had built the first incarnation of this steel guitar a few years back when I had to go on a business trip and wanted an instrument to take along. I was only taking a carry-on so it had to be small enough to fit inside—it turned out to be a perfect fit.

Follow this link to the official project page for additional photos and build notes:

https://wp.me/P3WRqw-NH

Thanks,

JSA S2 – Produce Better Sounding Guitar Videos Using Your Phone

JSA S2 – Better Video Demonstrations – Audio Clarity with Less Noise

Understandably, this is not technically a “building” suggestion, but presentation quality is just as important as build quality. You can build the most awesome sounding guitar ever, no one will ever know if you can’t properly represent the audio.

img_1770img_1761-1

Currently, I’m using the iRig Recorder app along with the iRig Guitar Interface from IK Multimedia. The cost comes in under $20 for both items and each is readily available at the App Store and on eBay respectively.

Here’s a video that I recorded using iRig Recorder. Please excuse the sloppy playing, but notice the clean signal to noise ratio. It’s not a bad audio recording for being recorded with an app on an iPhone. Enjoy!

Click on this link for a full tutorial on how to set up and use this iRig app and interface:

https://wp.me/P3WRqw-IY

Thanks,

junkshopaudio.com


Shakespeare Hardback Book – Three-Stringed Electric “Cigar Box” Guitar

Version 2IMG_1500IMG_1505

I had a crazy idea to make a book into a guitar and this is the product. It took a while to find the right book, but eventually I landed on this copy of the Complete Works of William Shakespeare. It was a mix of the correct size and thickness; plus, it’s Shakespeare.

I did some quick Internet research and didn’t see any other “book guitars”, so I assumed I was in fairly uncharted waters. I took some time and thought about how I should best proceed. In the end, a straight edge and razor blade seemed the best course.

I would be lying if I told you that the first cut was easy. I’m not in the business of destroying books, but…

IMG_1327IMG_1328IMG_1329IMG_1330IMG_1331

I found the center of the book and measured the width of the neck wood. Then, I taped it off and drew the lines. I cut out the side first, to the depth of the neck, and then cut the center to the same depth. After the center was removed, I set the temporary neck in the center and replaced the side pages—everything fit great.

IMG_1462

Next, I fastened the outer pages to the back cover with some flat, low profile bolts. I drilled through the pages and back cover, installed the bolts, and then chiseled a small area on the inside of the front cover to allow for the other end of the bolt. Now, the pages wouldn’t fall out and it would be a secure area for the electronics.

IMG_1461IMG_1466IMG_1468IMG_1467

I cut down the neck, glued it, and carved the Double Razorblade head design that will be my official Junk Shop Audio head going forward. I cut a channel for my Junk Shop Audio Nd144 pickup and stained the neck with a steel wool and balsamic vinegar blend that looks awesome.

IMG_1479

I fastened the neck through the back of the book with flat furniture bolts. These bolts come in a variety of colors and are strong—the neck was firmly attached and the bolts looked cool.

IMG_1482IMG_1481

To hold the pickup in place, I used some metal scraps from the 9v adaptor deconstruction. I lined them up on the neck, grabbed them with a length of duct tape, and placed the tape in the correct area on the back of the book cover. the magnets on the pickup will attract to the steel scraps.

IMG_1483

I cut a hole for the 1/4″ jack and a small channel between the jack hole and pickup for the wire.

IMG_1484IMG_1501

I installed the small piece of angle with three brass screws. and then added the simple machines—made of ground thumb screws and rod nuts—and a bridge made of a cut bolt, filed flat on the bottom.

IMG_1502

For the head, I used stainless bolts, brass washers, and brass knurl nuts to hold the strings in place and a cut bolt for the nut. The frets are drawn on in pencil, because I may add a fretboard and frets in the future.

Acoustically, the guitar sounds louder and more bassy than I thought it would; amplified, it sounds really dirty when you kick in the overdrive.

Check out this quick and dirty video:

Thanks,

img_1926-2