Grandma Ruth’s Cedar Bible Box Fretless Guitar

My grandma, Ruth, turned 92 on August 13th, so I thought I would make her a guitar from this cedar bible box that I found at a local thrift store.

The box had a cool grain, but I wanted to finish it with my usual vinegar and steel wool concoction, so I sanded it down. However, in the process, I lost the script and stamp on the front and back.

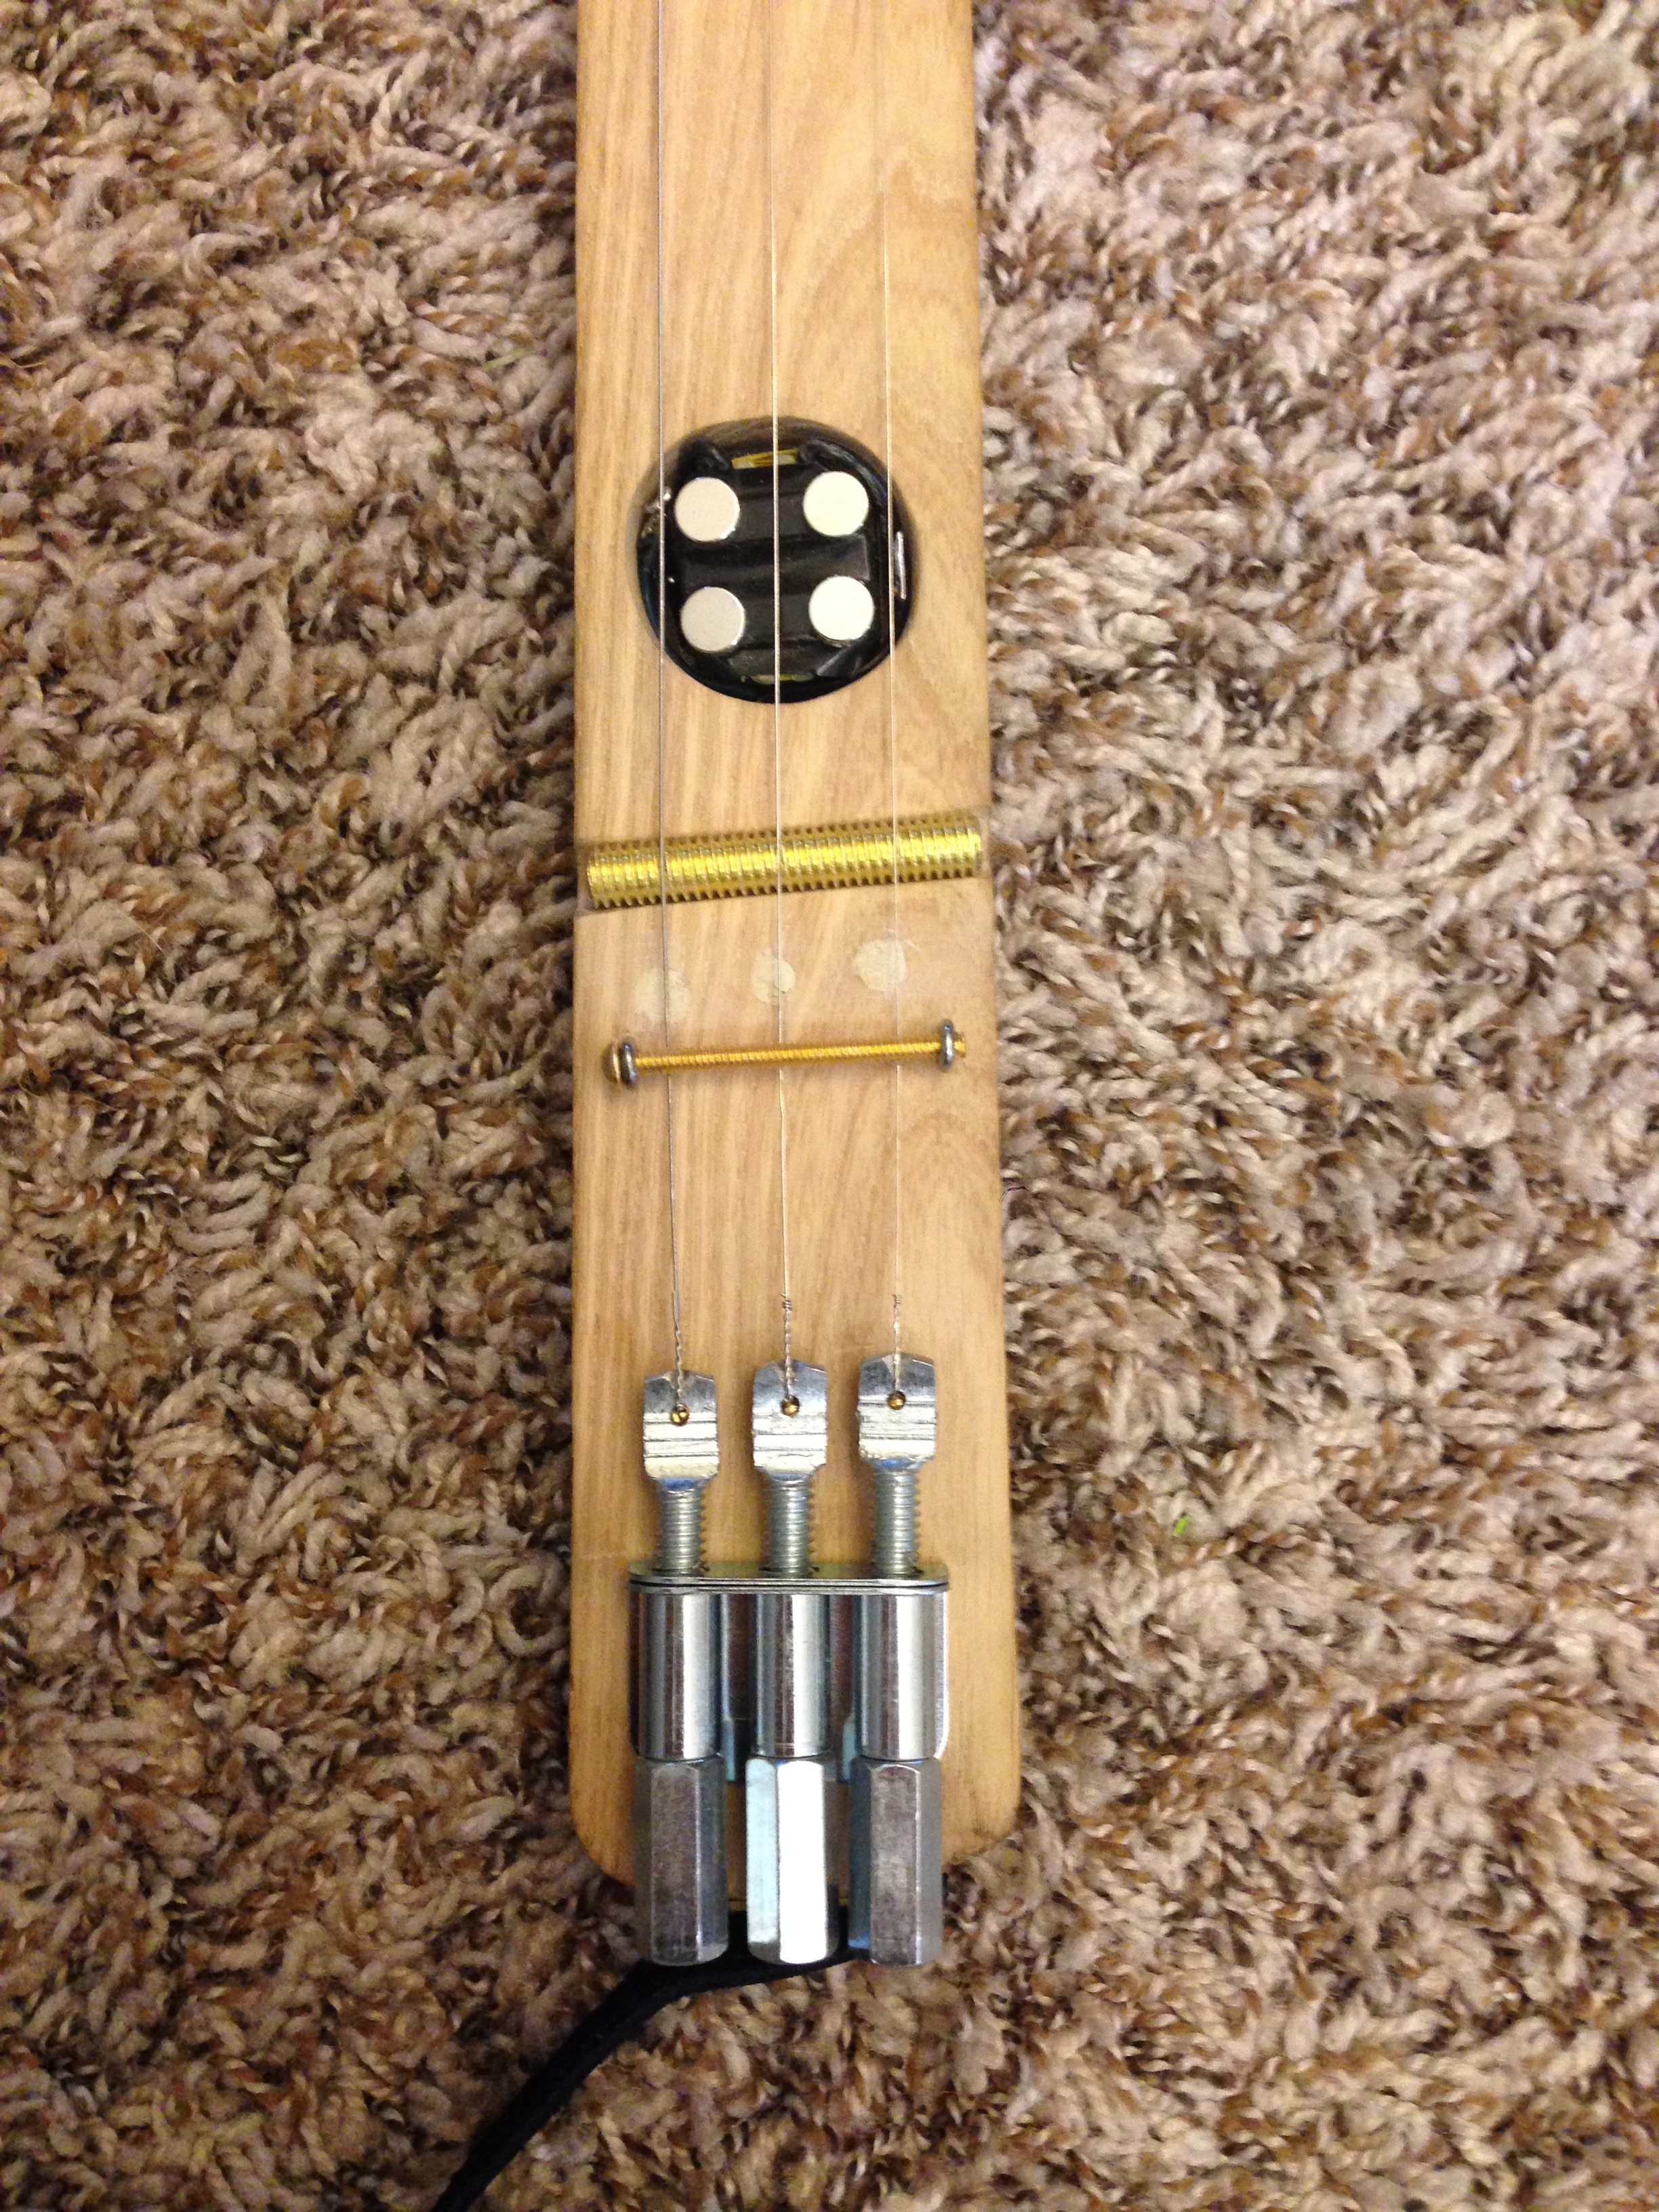
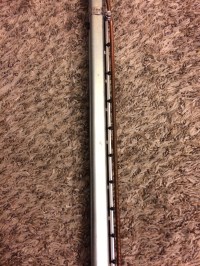
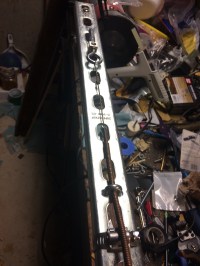
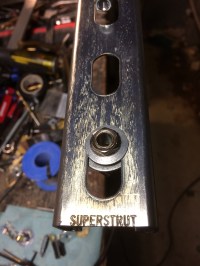
I began by cutting a hole in the box, which would fit the 1×2 maple stick and a 1/4×2 oak cover plate perfectly.

Sanding softened the appearance of the grain and added distress to the hardware.

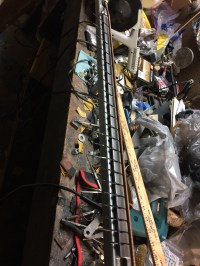
I cut a slot for the tuners and the pickup in the body, then drilled holes for the string fasteners and carved the signature blades into the headstock. An oak fretboard was added, along with an oak electronics cover.

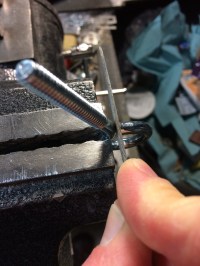
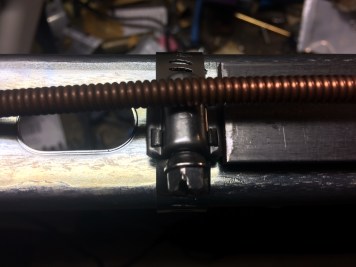
Then, I cut down a 3/8″ carriage bolt and filed a 3/8″ round slot in the fretboard at the nut position.

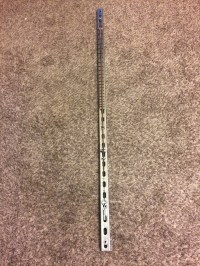
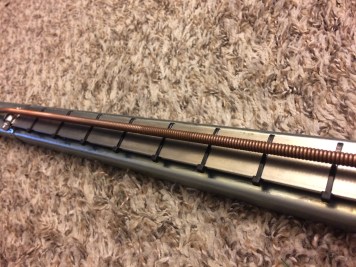
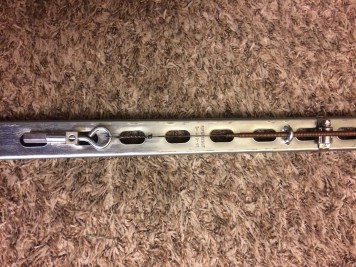
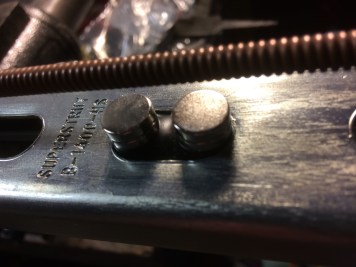
I Slipped the stick into the box and figured out where the three top holes should be drilled to correspond with the internal tuners.

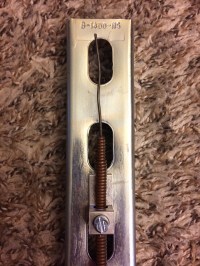
I checked to see how the 6″ replica Roman crucifixion nail would look relative to the 24-3/4 scale length and everything lined up well.

img_3052img_3053

New to this build is the official Junk Shop Audio branding iron. I found a branding iron maker that creates custom irons from solid brass. I made this small coal-burning heater based on plans I found on an outdoor survival site—it is comprised of two large can goods cans, a cat bowl, a drawer pull and a handful of nuts and bolts. I needed a rustic maker’s mark for my guitars and this branding iron fit the bill.

I changed the design to accommodate more fuel and higher heat, but the original portable stove can be found here:

https://www.treehugger.com/clean-technology/build-ultra-efficient-diy-wood-gasifier-backpacking.html

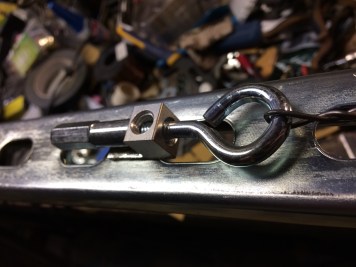
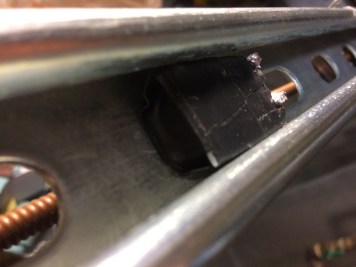
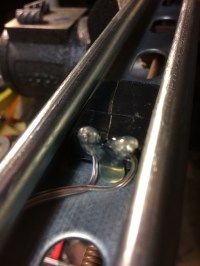
I installed a Nd144 Electromagnetic Cigar Box Guitar Pickup and a 1/4″ jack.

I secured the oak cover plate to the back and affixed the replica Roman nail card to the interior of the lid.

I measured and filed the fret markers, strung it with 10’s tuned to G-D-G and then made and added an American flag duct tape strap.

I’m really happy with the way this guitar plays. The additional height from the oak fretboard allows the player to fret notes and play slide for an additional range of sounds and playability.

Thanks,

Ripped Baseball Bat “Cigar Box Style” Electric Slide Guitar

IMG_2851 IMG_2848 IMG_2849

IMG_2850

I completed this prototype back in November 2015. It was a really cool project, but I just got around to writing up the build notes. The first thing I had to figure out was how to rip the bat in half. I didn’t have a table saw or bandsaw—just a circular saw and chop saw—so I decided to make a box that would almost perfectly fit the baseball bat. Then, I used a square to center all of the parts of the bat parallel to the sides of the box. To achieve this, I used different thicknesses of scrap wood to shim the bat into a centered position.

Once the bat was centered, I used a square to mark the cutline, which was slightly off center to allow for the best bat depth to fretboard width ratio—I wanted to retain as much material as possible to add strength, but I still needed enough fretboard width for three strings. I found my measurement and then set the circular saw guide relative to one side of the box.

IMG_2759IMG_2761IMG_2762IMG_2763

I placed the box on the ground and up against the sidewalk. The box is much longer than the bat to allow extra room for the circular saw to drop in and begin a straight run toward the end of the bat. The saw must run through at a slow even pace, straight through the end block to complete the cut. The bat moved a bit, as the saw cut through its length. This resulted in a less than flat surface that required a bit of planing. I placed the surface with a hand planer until a level sat flat against the surface. I sanded the cut surface with sandpaper, but left the outer part of the bat untouched.

I filed a 3/8″ groove 24-3/4″ from the nut location and then cut two brass bolts, placing one in the bridge position and filing the other down to half thickness for the nut.

Pickup and 1/4″ Jack:

I purchased a second 1-1/4″ spade bit and sawed off the center point tip, so that the bottom would be flat and less likely to penetrate the back side of the bat. The pickup hole was started with the old bit with the tip and completed with the new bit without the tip. I installed a JSA Nd144 Electromagnetic Cigar Box Guitar Pickup and planned to wire it straight to the jack. My biggest concern was that I would drill through the back of the bat, so I was careful to measure and drill small bits at a time.

The endpin jack was too big to fit at the end of the bat as a circle, so I ground it down to more of a triangle, leaving the holes. The hole for the jack and wire was drill straight through to the pickup hole with a long 1/2″ bit. The jack fit well, but had to be bent a bit on the bottom to conform to the curve of the bat—a few brass screws held it in place nicely.

Tuners:

This was the first application of my Simple Tuners, as I created them for this particular project. Given that I wanted to keep a clean baseball bat profile at the back of the guitar, standard tuners would not work, so I came up with these tuners that attached to the front surface.

Headstock:

I found this old bottle opener and it fit perfectly on the headstock, so I fastened it down and then installed two more screws to set the height. I filed three notches to hold the strings and then added a string tensioner, made of a brass bolt and two small eye-screws and it was ready to go.

Check out this quick and dirty video:

Thanks,

uW5Z0b

“Crude Theremin” – Tube Oscillator and Homemade Electromagnetic Guitar Pickup

I was making an extra three-string removable pickup from my JSA Nd144 Electromagnetic Cigar Box Guitar Pickup and started thinking about some of its other features.

I recently found an old tube oscillator at the antique mall and thought I might be able to do something interesting with it. So I hooked up the removable pickup to my amp and powered on the oscillator. With one hand on the frequency knob and the other manipulating the volume via pickup proximity, you can get some pretty cool brassy synth tones.

The removable pickup is made of a 9v adapter coil and a homemade 1/4″ jack.

Follow this link to view step-by-step build instructions for the 9v adapter pickup:

9 Volt Power Adapter Guitar Pickup

Follow this link to view the homemade 1/4″ jack build instructions:

JSA Cigar Box Guitar S3 – Homemade, Space-saving 1/4″ Output Jack for Guitar

The wiring is simple—two terminals on the pickup: one attached to the hot on the jack and the other to the ground on the jack. Then, I just taped them together.

I need a bit more practice, but here is a quick and dirty video for now:

Thanks,

“Road Ready Polymer” – All-Plastic, First Act Electro-Acoustic Modification

I found this plastic First Act acoustic for six dollars at Goodwill—why not…everyone has to get their hands dirty at some point.

Here are the before pictures:

Body and Finish:

The body and “finish” were in fairly good shape, but I had to do something the change it’s appearance. I decided to leave the back, sides, and neck alone, so I painted only the top of the body and front of the head.

I wanted to make the deterioration on the finish more interesting so first I painted the top and head Safety Red then I painted Hammered, Burnished Amber. The thinking is that the amber will first wear down to red, then to the original “burst” finish.

Another interesting aspect of this guitar is the inner structure. The guitar seems rather sound, so I’m confident that it should holdup to 11’s.

Tuners:

I changed out the tuners—the replacements were second-hand, crappy yes, but not as bad as the originals. The classical acoustic tuners fit perfectly without modification and the addition of brass screws finished off the abomination perfectly.

Pickup and Bridge:

Of course for the pickup, I taped together two Nd144 Electromagnetic Cigar Box Guitar Pickups. I drilled and installed a 1/4″ jack in the lower-right and wired it straight to the pickup.

For pickup installation, I taped two washers in the bridge position with Command Strips—the magnets on the pickups attached to the washers for easy installation.

The bridge is a 3/16 brass bar that helps enhance the steel strings, serves as a grounding point and adds a focal point.

Final thoughts:

Otherwise, it works—it cost $22, plus scrap parts, and took a few hours to enhance. Plus, the top will look pretty cool once it acquires some genuine wear and tear.

Check out this quick and dirty video, which offers some haphazard slide work:

Thanks,

“Slice of Deliverance” – Steel-String Resonator Banjolele w/ Removable Pickup

I chanced upon this banjo uke for a steal at the local antique mall and couldn’t pass up a new project. From what I’ve read, this style of banjo ukulele was produced through the 20’s and 30’s and it’s in really great shape compared to some I have seen for sale online.

This instrument came with a traditional drumhead, but no bridge. Against the advice of most ukulele enthusiast sites my plan was to string it up with steel strings, so that I could add a removable pickup, which is apparently I’ll advised because the neck could succumb to the pressure.

The Before Pictures:

Finish:

The finished was scratched, but was otherwise in fine shape; however, I wanted to add my own style, so I sanded off the finish and stained it with a vinegar and steel wool concoction.

I started with the white vinegar mix that adds a rusty, yellow hue while darkening deep spots. Then, I finished with an apple cider mix that adds a bit more color, grain depth and shine. The mix results in a distressed look that enhances the natural grain, while adding subtle nuances as well as dramatic extremes.

Drumhead and Bridge:

I began by cutting a piece of brass rod for the bridge and then strung it with the top four strings from a pack of DR Pure Blues 9’s.

The uke tuned up, but the drumhead was strained, which lowered the action to the point of rubbing on the rim. So I had to find a new material for the head that would be thin enough to offer as good of a voice as the drumhead.

I had a paint can lid laying on the bench and it appeared to be the right size, so I cut off the rim and it was a perfect fit to replace the drumhead.

Tuners and Tailpiece:

The tuners weren’t complete trash, but I didn’t like the look of them and since I was going to use steel strings, it seemed like a good idea to install decent tuners. I found a set of Grovers that worked great and had a lower profile.

The tailpiece was meant for holding strings with smaller balls ends, so I had to drill small holes in the body to accommodate the steel string balls and allow the tailpiece to sit flat against the body.

Pickup:

Since the paint can worked out so well, it created a perfect opportunity for using a removable pickup made from two of my Nd144 Electromagnetic Cigar Box Guitar Pickups. I had originally built a similar pickup for the “Teeth for Days” build, which had a body that was to thin to house a permanently installed pickup.

Therefore, I created a compact pickup and 1/4″ jack combination that could be easily installed and removed. Since the paint can lid is made of magnetically sensitive material, the pickup can be installed at a whim.

This solves two problems—first, placing the pickup directly on the paint can lid stifles the resonating effect to some degree, so easy installation and removable allows the user to play acoustically without compromise. Second, installation via the inherent magnets keeps me from having to drill extra holes and add unsightly hardware for both the pickup and the output jack. In short, the pickup is fully functionally electric without radically changing the acoustic nature of the instrument.

The most interesting and functional aspect of this pickup is its ability to be removed and potentially used to electrify/amplify another guitar with a body made from magnetically sensitive material, such as a lunch box or cookie tin. The pickup and output jack is wired up and taped together as one unit to simplify this process.

A second feature is the exposed, copper ground wire that makes contact with the paint can lid upon installation. This signal travels through the all magnetically sensitive materials that come in contact with the chain, so the paint can lid, bridge (if changed to steel), strings, and tailpiece all become a place to ground the signal, thus reducing amplifier noise/hum.

Accessories:

I added a strap button comprised of a security bolt and a brass knurled nut. I simply drilled a larger hole in the body and tailpiece to accommodate the larger bolt.

The strap was made from duct tape printed with an American flag design and the headstock strap tie was made of black duct tape with a brass binding screw to hold everything together.

Final Word…

This was a cool project and I developed and appreciation for the ukulele and the benefits of its small size, along with this instrument’s marriage with the banjo.

Check out this quick video that offers this instrument’s amplified and acoustic tones:

Thanks,

Yard Dog – “SuperStrut” All-Steel, Ultra-Low, Single-String Electric Djent Bass

At a past St. Louis Cigar Box Guitar Club meeting, Sean Oliveira brought in a bunch of piano strings from a unit he had dismantled. He was offering them for free, so I took a thick, low string along with a medium-sized one. I decided to challenge myself to build a guitar around the low string, which has a diameter of roughly a 1/4″.

Since this thick string would exert a lot of force against the instrument’s frame, I would need something a bit more resilient that my usual wood structure. I wanted to maintain a size similar to my previous builds so I chose slotted 1-5/8″ x 13/16 strut.

I started with a five foot length of strut and measured the distance between the bridge and the nut on my Peavey bass, which came out around 34-1/4″. Everything needed to be beefed up on this build—two-hole angles were too weak to handle the force—so everything had to be reconsidered.

Tuner and String:

The first thing that I needed was something to hold the string. Usually I would clamp it with a bolt and knurled nut, but a 1/4″ diameter string needs something more substantial. Luckily, I was able to find some aluminum wire lugs in the electrical section at Lowes. These were excellent both for clamping the string behind the nut and anchoring the tuner.

The tuner is made from a heavy-duty 1/4″ eyebolt, a 1/4″ x 3/4″ steel spacer and a 1/4″ rod coupling. The piano string came with a loop, so I removed a small amount of material at the junction of the eyebolt to allow the string loop to slip onto the eyebolt.

Nut and Bridge:

The nut and bridge are made of stainless steel pipe clamps. I wanted to attach the nut and bridge since the vibration of the large string made it difficult to keep a bolt or other material in place by the force of the string alone. These clamps work perfect for the string size and allow for a proper action. Additionally, I added a u-bolt at the back of the nut and bridge. There was very little tension holding the string in place—the u-bolts worked to create a more focused sound.

Fretboard:

The fretboard is a length of 1/8″ x 1″ steel. It is adhered to the strut with neodymium magnets, which raises the height of the steel just slightly, making the application of zip tie frets possible. I’ve always wanted to try zip tie frets, but I was unhappy with the zip tie being around the back of the neck—this allowed me to place the zip ties around just the steel bar, leaving the back of the strut smooth.

Pickup and Output Jack:

The base coil of this pickup is the same as the Nd144 Electromagnetic Cigar Box Guitar pickup, but I had to modify it to allow for a proper fit. The plastic on the bobbin had to be trimmed to the coil and I used slightly larger neodymium magnets that fit within the slot in the strut.

Nothing special about the 1/4″ output jack. I installed it close to the bottom, with some odds and ends, so that it was out-of-the-way and close to the pickup.

Here’s a quick and dirty video featuring my Peavey bass stack from way back:

(VIDEO PLAYBACK REQUIRES HEADPHONES—SMART PHONE SPEAKERS CAN NOT ACCOMMODATE LOW FREQUENCIES)

Thanks,

img_1926-4

“No Parking”—6 Foot Signpost Resonator Guitar

There an interesting origin for this instrument; the idea actually came to me while I was playing Bowmasters with my son. Bowmasters is an app where opponents try to strike or impale each other with various items. One of the characters throws a sign as seen below:

For some reason this struck me as an excellent idea for a guitar so…I made a six-foot guitar. This resonator guitar has two selectable pickups, one that has a clean sound and another that transfers the grit from the sign.

Follow this link to the official project page for additional photos and build notes:

“No Parking” 6-Foot Signpost Resonator Guitar

Thanks,

img_1926-1

JSA S2 – Produce Better Sounding Guitar Videos Using Your Phone

JSA S2 – Better Video Demonstrations – Audio Clarity with Less Noise

Understandably, this is not technically a “building” suggestion, but presentation quality is just as important as build quality. You can build the most awesome sounding guitar ever, no one will ever know if you can’t properly represent the audio.

img_1770img_1761-1

Currently, I’m using the iRig Recorder app along with the iRig Guitar Interface from IK Multimedia. The cost comes in under $20 for both items and each is readily available at the App Store and on eBay respectively.

Here’s a video that I recorded using iRig Recorder. Please excuse the sloppy playing, but notice the clean signal to noise ratio. It’s not a bad audio recording for being recorded with an app on an iPhone. Enjoy!

Click on this link for a full tutorial on how to set up and use this iRig app and interface:

JSA S2 – Better Video Demonstrations – Audio Clarity with Less Noise

Thanks,

junkshopaudio.com


PVC Bamboom Stick

PVC Bamboom Stick

fullsizeoutput_686fullsizeoutput_687fullsizeoutput_688fullsizeoutput_689fullsizeoutput_68b

The handle on Bennet’s Bamboom Stick failed during its first use. Bamboo is strong for its thickness, but, in addition to the handle, the frame cracked in four places, while I was cutting and shaping the instrument. The cracks were easy to fix with glue and clamps, but I’m not sure how it will hold up over time. Surely the handle will hold up with the addition of a dowel, but there was still reason for concern.

This led me to look for a more resilient material. PVC is strong and flexible and easy to manipulate. 1-1/4″ PVC pipe is an excellent size for the body and 1″ is perfect for the handle, as 1″ PVC fits close inside of 1-1/4″ pipe.

IMG_1671IMG_1673IMG_1670IMG_1677

For the handle slot, I made horizontal cuts on the body with a hacksaw and then used a 1-1/8 spade bit to remove most of the material on the front and back of the frame. The rest of the handle slot was shaped with files. I cut the handle from a 1″ piece of PVC; it fit snug within the opening. I also slipped a piece of 1″ wooden dowel into to 1″ PVC to reinforce the handle.

IMG_1674IMG_1681IMG_1679IMG_1678
I cut the pickup hole in the same fashion that I shaped the handle slot. Much like the bamboo version, it allows limited range, but a bit more room to install the piece of angle that would hold the simple tuner and the 1/4″ jack. The wall of the 1-1/4″ PVC was too thick for the nut on the 1/4″ jack to fit, so I filed down the outer side of the frame, around the hole, until installation was possible. Although it appears ugly, I have started using hot glue to strengthen my solder joints; it keeps me from having unexpected delays.

IMG_1672fullsizeoutput_688
To create more clearance at the front of the handle, I cut down a 1″ cap and glued it to the front portion of the handle. I filed a small triangular notch into the top of the handle and used a screw to tighten the string down. A binding screw worked well to allow the handle to pivot. I added an eye bolt, bent to an angle, to act as a nut and to set a consistent action. For this PVC version, I decided to use heavier eye bolts than I used on the bamboo version to further strengthen the instrument.

IMG_1674IMG_1676IMG_1683IMG_1682

Because of the limited space, I had to set the piece of angle, then install and solder the jack to the pickup, then install the bent eye bolt, and finally, set the pickup in place. In this PVC version, the JSA Nd144 pickup sat loose in the hole, so I cut and shaped a small piece of 1″ PVC to fill the space. I filed the inner sides of the 1″ piece of PVC until the pickup fit snug. After that, I added the usual simple machine to set the open note/octave.

fullsizeoutput_687IMG_1696

I added two 1-1/4 jacks to the top and bottom of the frame and a 1″ cap to the back of the handle. For the bottom, I installed a screw-on rubber bumper so that it doesn’t slide on the floor. Additionally, I left the remaining string intact, since there is no easy way to keep the instrument grounded. The jack is grounded to the bridge eye bolt, so one must simply hold the remaining string against the handle, while playing, to keep a constant ground.

fullsizeoutput_68a

Just like the bamboo version, there is only one E string, but the instrument has a lot of range. I added a simple tuner so that the player can set the open note/octave. The player controls the pitch by tightening and slacking the string with the handle and there is definitely a learning curve, as the player has to listen for the note correct pitch—I place the difficulty level somewhere between playing slide guitar and trombone.

IMG_1684

It seems important to note that when I tested this instrument the string broke rather than the frame or handle.

Check out this quick and thoroughly awful video:

Thanks,
img_1926

Bennet’s Bamboom Stick

Bennet’s Bamboom Stick

IMG_1663IMG_1647IMG_1649IMG_1651

“Bamboom” was how Bennet used to pronounce “bamboo” when he was younger. In Army of Darkness, Ash called his shotgun a “boom stick”—no real correlation, just a fun fact.

This instrument was commissioned by Bennet. I can’t remember what it is really called, but Bennet fell in love after playing one at the St. Louis Cigar Box Guitar Club. Both the frame and handle are constructed entirely of bamboo. The one that he saw included a cigar box and piezo pickup, but I wanted to streamline the design, so I cut a hole and installed a JSC Nd144 electromagnetic pickup. 

IMG_1635

Bamboo is incredibly strong for its thickness and weight, but it is easy to manipulate once a hole is created. I made horizontal cuts with a hacksaw and then drilled a couple of holes, where I wanted to cut vertically, and sawed a half inch strip out of the center. After that, a sharp chisel cut the rest relatively easy, with a surprising amount of control over how much material was removed.

IMG_1636

I cut a handle from a smaller diameter piece of bamboo; it fit snug within the opening. Build note: if you are thinking about constructing a similar instrument and use a bamboo handle, consider reinforcing the handle with a piece of dowel rod. The handle on this instrument cracked during its first use. I’ll just remove the twine and then glue and clamp the handle on Bennet’s, but it’s better to reinforce the handle from the start.

IMG_1641

From the pickup hole, I had limited range to place the piece of angle that would hold the tuner and the 1/4″ jack, but that was the only access that I had without creating more holes. It was tight, but it all fit without interfering with the connections. IMG_1642IMG_1643IMG_1645

I filed a large rectangular notch into the top of the handle and use a 1/4″ bolt and rod coupling to tighten the string down. A couple of brass pieces and binding screw worked well to allow the handle to pivot. I also rounded out the back of the frame to allow the handle more range and added an eye bolt, bent to an angle, to act as a bridge and set a consistent action.

IMG_1644

Because of the limited space, I had to set the piece of angle, then install and solder the jack to the pickup, then install the bent eye bolt, and finally seat the pickup. I was extremely happy that it all worked the first time. After that, I added the usual simple machine to set the open note/octave.

IMG_1654

For the bottom, I added a screw-on rubber bumper so that it doesn’t slide on the floor. I fit perfectly, with a little persuasion.

There is only one E string, but the instrument has a lot of range. I added the simple tuner so that the player can set the open note/octave. The player controls the pitch by tightening and slacking the string with the handle and there is definitely a learning curve, as the player has to listen for the note correct pitch—I place the difficulty level somewhere between playing slide guitar and trombone. Good times.

Thanks,

img_1926